Things You'll Need
Broom
Wire brush
pH-neutral cleanser
Degreaser
Concrete joint sealant
Level bar
Concrete grinder
Floor sander
Self-leveling compound
Trowel
Chalk line
Thinset mortar
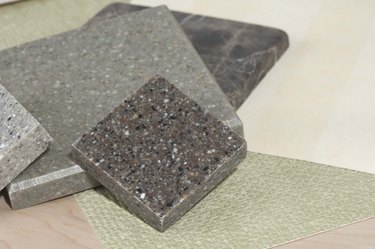
Granite tiles
Tile spacers
Wet saw
Carpenter's level
Rubber mallet
Grout float
Grout
Sponge
Lint-free cloth
Grout or tile sealant
Granite tile is an extremely strong and durable flooring product, which can be installed in both interior and exterior locations. A concrete surface acts as an excellent subfloor for the tiles, being both strong enough to bear the weight of the stone and easily prepared for laying the tiles. Though installation of granite tiles on a concrete surface can be time consuming, with the necessary preparation time, and by following the proper installation procedures, you'll have a floor that not only adds to the attractiveness of a room but lasts for decades with only minimal maintenance required.
Step 1
Clean and repair the concrete surface. Sweep the floor using a broom and remove ingrained dirt and debris using a wire brush. Wash the surface of the floor using a pH-neutral cleanser, and then remove any grease stains that may be present using a degreaser. Repair floor cracks or flaking by cleaning out the cracks and removing any flaked areas; fill the cracks with a concrete joint sealant and fill holes or flaking areas with a self-leveling compound, spreading the compound with a trowel.
Video of the Day
Step 2
Level the floor if needed. Check for level by running a level bar across the floor surface to find any high or low levels. The floor is level if there is no difference in height greater than 1/8 inch. For higher portions of the concrete, grind the surface level using a concrete grinder. Dips in the floor should be filled with self-leveling compound, spread with a trowel until the surface is even.
Step 3
Find the center point of the room by measuring the room's walls, marking the center of each. Run a chalk line between opposing walls at the center points; raise the string and allow it to drop, snapping a line against the concrete floor. Where the lines meet is the center of the room.
Step 4
Place two crossing test rows of the granite tiles onto the floor following the chalk lines, as a dry run to plan the tile layout. Determine the pattern of tile placement that will allow for the largest number of whole tiles placed onto the floor, with partial tiles placed against the walls that are least seen from the room's doorways. You may need to snap new lines for adjusted tile placement. Remove the test tile rows.
Step 5
Spread a layer of thinset mortar onto the surface of the concrete, beginning at the center of the floor, using a chalk line as a guide. Spread the mortar with the flat edge of a trowel and then go over the mortar with the notched edge of the trowel to raise ridges in the mortar. Spread the mortar in an area that can secure three tiles at a time, and then place the tiles into the mortar, following a chalk line as a guide, pressing the tiles firmly into the mortar bed and applying a slight twist to the tiles to set them into place. Use two tile spacers between tiles to create uniformly spaced tiles. Work outward from the center of the room, covering half the floor with the granite tiles before beginning to lay the tiles on the second half of the room.
Step 6
Place partial tiles at the sides of the floor, cutting the granite tiles to fit using a diamond wet saw rented from a home improvement store or equipment rental shop. Wait overnight for the mortar to dry.
Step 7
Check on the level of the surface of the tiles using a carpenter's level, tapping unlevel tiles with a rubber-headed mallet to level them with surrounding tiles.
Step 8
Remove the tile spacers and fill the joints between the tiles with grout. Apply the grout using a grout float to pack the substance into the joints. Remove any excess grout from the granite tiles using a damp sponge, and allow the grout to set overnight.
Step 9
Clean any grout residue from the surface of the tiles using a lint-free cloth, and allow the grout to continue curing for three weeks. After the curing time, apply a grout sealer to the joint lines between the stone tiles if the tiles are glazed granite; if the tiles are unglazed, use a tile sealant across both the tile and grout surfaces to protect them from the elements.
Tip
Purchase a thinset mortar which has been specially modified for granite floor tiles, for the best bonding possible.
Video of the Day