Any hydroelectric system requires a motor or generator to convert the rotation of the water wheel into electricity. An alternator can be used in a micro hydro system as this generator to charge a battery, the power from which can then be used as any other electricity source. Modern alternators make very good generators and include within them diodes to convert the electrical power generated within them from alternating current (AC) to direct current (DC), which can be used to charge the battery.
- Waterproofed plywood
- Waterproofed wooden rods
- Alternator
- Cogs or wheel with belt
- Battery
- Plastic sheeting
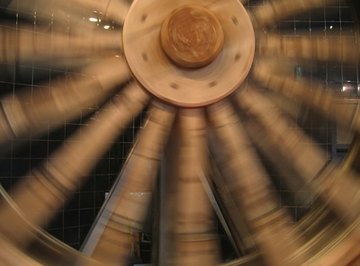
Construct a simple water wheel with waterproofed plywood. Make two large discs the basis of the wheel and several paddles equally spaced around the circumference connecting them. Angle the paddles upward to increase the surface area that will be in contact with the water as it passes.
Make a base to support the water wheel with waterproofed wooden rods. Make two triangles, one for each side of the wheel, slightly wider than the wheel at the base and slightly higher than the center of the wheel at their top point. Connect the two triangles at each corner with horizontal rods. The rod that joins the top points should go through the center of the water wheel, supporting it and still allowing it to rotate freely.
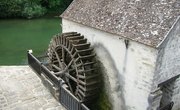
Position the water wheel and its base in the water and ensure that the wheel is being turned by the water. It is more efficient to place the water wheel to be turned by water falling from a drop or fall if possible, although it will still generate electricity if it is pushed by normally flowing water.
Connect to the center of the water wheel another rod that extends to the bank. This will convert the rotations of the water wheel to rotations within the alternator. Attach a large cog to the end of the rod extending from the wheel. Then attach a much smaller cog to the alternator and combine the two. This will allow several turns of the smaller cog attached to the alternator for every single turn of the larger cog attached to the wheel.
Alternatively, a wheel, such as a bicycle wheel, with the tyre removed can be attached to the rod extending from the water wheel. Run a belt around this wheel and around the alternator; the turning of the larger wheel will turn the smaller alternator head quickly.
Wire the alternator to a battery. Connect the positive and negative wires coming from the alternator to the corresponding electrodes on the battery. As it generates electricity, the alternator will charge the battery and this electricity can then be used as power.
Cover the alternator, the battery and the gears or belt between the alternator and the wheel with plastic sheeting for protection from the weather.
Things You'll Need
References
About the Author
Jess Smith has been a writer and editor since 2008. She served as co-editor-in-chief for the "Edinburgh University Science" magazine. Smith holds a Master of Science in neuroscience from the University of Edinburgh.
Photo Credits
traditional water wheel image by Yali Shi from Fotolia.com