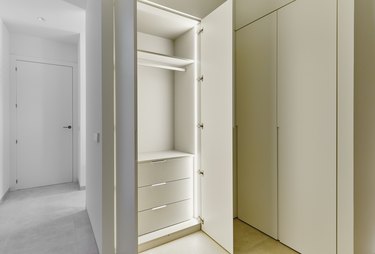
If you love the convenience of having the light in the refrigerator turn on automatically when you open the door, you may want to make the same thing happen in a closet or a dark room. It's pretty easy to do; all you have to do is replace the wall switch with a push-button switch that you install in the hinge side of the jamb for the door to the room.
A push-button door jamb switch comes with its own electrical box, which is smaller than a conventional one, and a flush-mount cover plate that won't interfere with the operation of the door. Besides installing the box and connecting the switch, you also have to run a cable to the switch from a power source (the line) and another cable to the light fixture (the load) or alternatively, a single cable from a light fixture that receives power directly. This is especially easy to do if you're replacing an existing wall switch next to the door because the cables are probably already there.
Video of the Day
Video of the Day
Things You'll Need
Pencil
Hammer
Screwdriver
How to Install a Door Jamb Switch
You can do this installation with the door in place, but it will be easier if you pull the hinge pins and take down the door. Remember that power must be off to all the electrical wires you handle during this procedure. Turn off the circuit breaker and leave it off until you're finished.
Step 1: Select a Spot for the Switch
Choose a location for the switch on the hinge jamb. The button needs to be about 3/4 inch from the inside edge of the door stop. You'll probably need to pry off the door stop with a flat bar to complete this procedure.
Step 2: Cut a Hole for the Electric Box
Place the front of the box flush against the door jamb and trace around it with a pencil. Include the tabs on the top and bottom but shade in those areas because you don't want to cut them out; you want to mortise them after cutting the hole so the box will recess into the jamb.
Cut along the outline with an oscillating tool or jigsaw and then chisel out the shaded areas to a depth equal to the thickness of the tabs or a little more. Test the fit and make any necessary adjustments.
Step 3: Run Wires to the Hole
If you are replacing a nearby wall switch, you may be able to simply reroute cable from there to the door jamb. If not, you may have to run a brand-new cable from the panel and another one from the light fixture. Use 12- or 14-gauge, two-conductor cable with a white wire, a black wire, and a ground.
Step 4: Install the Electric Box
Knock out the hole in the back of the electric box, feed the cable through, and secure it with a cable clamp. Set the box in the hole. Using a screwdriver, screw it in place with the screws provided.
Step 5: Wire the Switch
The switch has two black wires: one for connection to the hot line wire and one for the hot load wire. The wiring procedure depends on whether power comes to the light fixture directly and then to the switch or whether it comes first to the switch and then goes to the fixture. In the former case, the white wire coming from the fixture connects to the black wire at the fixture and should be labeled with black tape at both ends to identify it as a hot wire. In the latter case, you don't need any special identification.
Start by connecting the ground wires to the ground screw on the electrical box. Then, connect each of the black switch wires to one of the black wires in the box. If you have a white wire with black tape, connect that to one of the switch wires. If power comes first to the switch, you'll have two white wires in the box. Twist them together and cap them.
Step 6: Finish Up
Cap all wire splices with wire caps and then push the wires into the box and screw on the cover plate to which the switch is attached. Hang the door back on its hinges. Turn on the power and close the door to make sure the light goes off. Then open it to verify the light goes on. When you're satisfied, replace the door stop.