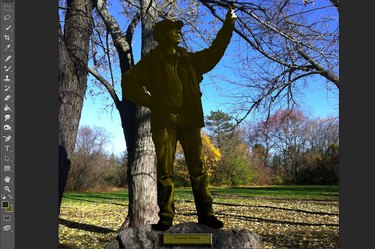
With the price of copper continuing to rise, memorializing friends in bronze is more expensive than ever. With Photoshop CC, you can achieve a reasonably authentic Roman god or goddess effect right on your desktop. The process involves isolating the model from the background and applying a bronze Color Overlay, while iteratively adjusting for tones. For best results, select a photo in which the model is wearing clothing of similar colors. As an artistic medium, bronze doesn't reproduce color tones, so striped pants and a plaid shirt will make this effect very hard to pull off. On the other hand, having your model pose majestically while on a rock or a horse will certainly help.
Step 1
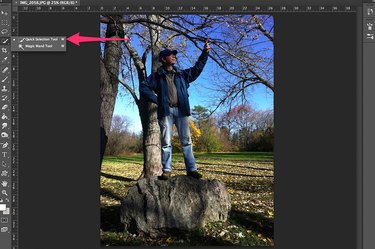
Open a photo in Photoshop. Use the "Quick Selection Tool" from the Toolbox to select the model by clicking him from head to toe. Don't worry if some of the background is selected too. Press "Ctrl-C" and "Ctrl-V" to copy and paste the model in his own layer.
Video of the Day
Step 2
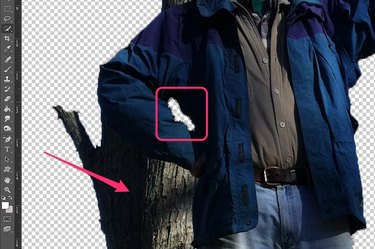
Hide the background layer by clicking its "Eye" in the Layers panel. Use the "Lasso Tool" or the "Eraser Tool" from the Toolbox to delete any background around the outline of the model.
Step 3

Select "Adjustments" from the Image menu and click "Levels." Drag the "Input" and "Output" sliders as needed to reduce the difference between the brightest and darkest parts of the photo. Bronze is a solid color so, except for shadows, any differences in tones will take away from your bronzing effect. If the model is wearing a light-colored shirt and dark pants, for example, adjust the levels to make the shirt darker and the pants lighter.
Step 4
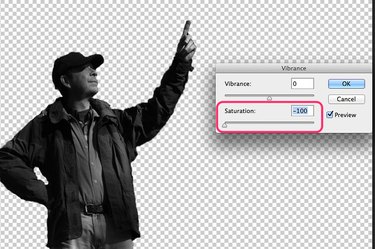
Click the "Image" menu, select "Adjustments" and click "Vibrance." Drag the "Saturation" slider all the way to the left to make the model's image black and white.
Step 5
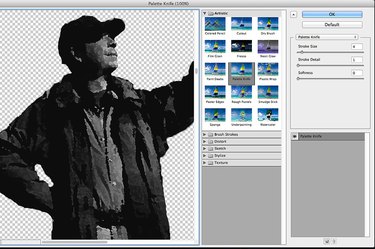
Select "Filter Gallery" from the Filter menu and click the "Palette Knife" option. Begin with a Stroke Size of "4," Stroke Detail of "1" and Softness of "0." Adjust the sliders as needed for your photo, or select one of the other filters, if preferred. The aim here is to make the model look less like a real human and more like a statue by replacing fine details with an artistic style.
Step 6
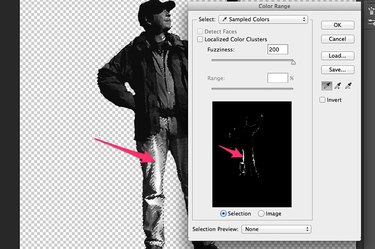
Select the "Color Range" option under the "Select" menu. Click on the brightest area on the model. Watch the preview window while dragging the "Fuzziness" slider to the right. Once all of the brightest areas are selected, click "OK." Click the "Foreground Color" in the Toolbar and select a medium-gray area on the model with the Eyedropper. You can then use the "Brush Tool" or "Mixer Brush Tool" from the Toolbox to darken the selected bright spots without affecting any other tones.
Step 7
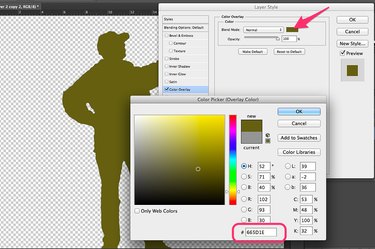
Right-click the model's layer in the Layers Panel, select "Duplicate Layer" and press "Enter" to create a copy of the model's layer. Select "Layer Style" from the Layer menu and select "Color Overlay." Click the "Color" icon beside the Blend Mode menu and type "665D1" in the HTML hex field to get a bronze color. Click "OK."
Step 8
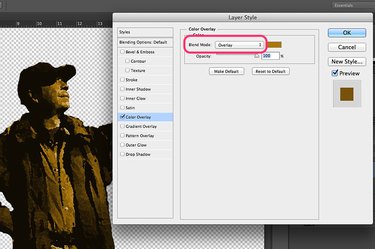
Select "Overlay" from the Blend Mode menu. Drag the "Opacity" slider all the way to the right, then click "OK." You now have what should be a decent looking bronze statue.
Step 9
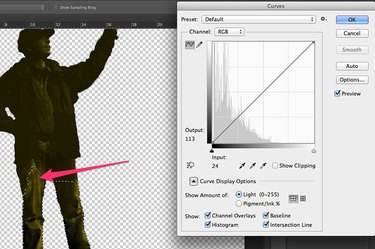
Click the "Quick Selection Tool" on the brightest areas of the statue to select them. Click the "Image" menu, then "Adjustments" and then "Curves." Drag the center of the diagonal line in the Curves window downward to darken the bright spots on the statue. A quarter-inch to a half-inch should be enough. Click "OK."
Step 10

Click the "Selection" menu, then click "Deselect." Make the photo background visible by clicking its "Eye" icon in the Layers panel. Select "Adjustments" from the Image menu one more time, and select "Brightness/Contrast." Adjust the brightness and contrast to make the statue's lighting fit in with the background. Keep in mind that statues look much darker than humans, usually with black shadows when photographed in direct sunlight.
Step 11

Add a plaque to your human statue if there's a good place to position it in the photo. Use the Rectangle Tool with a dark border and a light fill, using colors sampled from the finished statue. On both the rectangle and the text layers, use a Drop Shadow, which is available under the "Layer Style" option under the Layer menu. After adding the Drop Shadow to the rectangle, select "Bevel & Emboss," then "Texture" to add a speckled aging effect to the plaque.
Video of the Day