
How to Replace a Washing Machine Outlet Box

You want to install a new outlet box for your washing machine. Luckily, there are few steps to replace the old one. You can also use this same procedure for replacing any other outlet box, whether it's for your dryer, or in your kitchen, bedroom or living room. Follow the steps below and in just 15 minutes you'll have your new outlet box installed.
Instructions
-
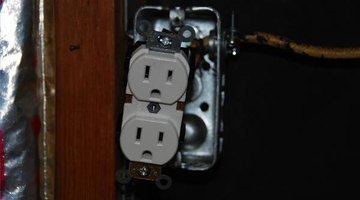
Go to the service panel and turn off power to the circuit. Remove the receptacle plate.
-
Remove the screws that fasten the receptacle to the box and pull the receptacle out. Loosen the terminal screws on the receptacle and remove the wires. Notice how the wires are connected so you can reconnect them easily.
-
Remove the screws fastening the old outlet box to the wall or the wall stud. Remove the box. If there is a connector that fastens the wires to the outlet box, loosen it and pull the wires out of the box
-
Pull the wires through into the new box, and place the box in the location of the old box. Screw it securely in place.
-
Connect the wires to the receptacle. Push the extra wire into the box, ground first, white next, black last. Put the receptacle into the box and screw in place.
-
Screw the plate cover back on. Turn the power to the circuit back on.
Writer Bio
Etienne Caron teaches English to speakers of other languages and has been writing for Demand Studios since 2009. He graduated from Westfield State College in 1993 with a bachelor's degree in regional planning.
Photo Credits
- Flickr.com/Nick Nguyen
More Articles