Things You'll Need
Newspaper
Fine-grit sandpaper
Tack cloth or soft rag
Decorative paper or assorted images on paper
Scissors
School glue or non-yellowing wood glue
Disposable plate
Foam brush
Shallow container
Gluing paper and wood together requires an adhesive that works well on both materials. Because both are porous, the glue choice is a bit less tricky than finding an adhesive for dissimilar materials such as wood and plastic. A standard polyvinyl acetate, or PVA, glue -- such as school glue or wood glue -- adheres paper and wood together. You can also use decoupage medium.
Step 1
Cover the work surface with newspaper, and then set the wood project piece on top of it.
Video of the Day
Step 2
Sand the wood in all areas where you plan to glue paper, using a fine-grit sandpaper. If, for example, you're covering the top of a plain wood cigar box with paper, sand the entire top of the box. Sand just enough to smooth away minor imperfections and to gently scuff any existing finish. Wipe the dust away with a tack cloth or soft rag.
Step 3
Set the pieces of paper atop the wooden object in the desired location. Use sheets of decorative paper over an entire wood surface, such as the sides of a box, or cut images or phrases out of paper to arrange as a collage or decoupage. Move the pieces around until you're satisfied with the layout. Trim excess paper from each paper piece, if necessary, using scissors.
Step 4
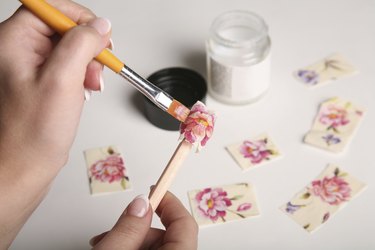
Squirt some of the glue onto a disposable plate. Dip a foam brush into the glue and apply the glue to the back of one of the pieces of paper. To glue one sheet of paper over an entire surface on a piece of wood, such as the top of a box, apply the glue to the wood instead. Smooth the glue into a thin layer with the foam brush, then press the paper onto the wood in the desired location, smoothing the piece down gently with your hands.
Step 5
Apply glue over the back of each piece of paper, smoothing the paper onto the wood each time. If a little glue seeps out from beneath the paper, smooth it over the wood or nearby paper pieces with the foam brush. Allow the glue to dry completely after adhering each piece of paper to the wood.
Tip
Create your own sealer by mixing equal parts water and school glue into a shallow container. Brush a thin layer of the sealer over the areas of the wood project piece covered in paper. Allow the sealer to dry completely. This step is optional, but helps protect the paper.
Decoupage medium may be used in place of school glue or wood glue, as it is designed for paper and doesn't yellow.
If you use a wood glue, select a bottle that indicates the product is non-yellowing if you intend to brush the glue over the top of the paper. Some wood glues yellow when dry.
Warning
If you print images out on paper to glue to the wood, test a dab of water or glue on a duplicate printout. Many printer inks are water-based and may bleed or run when wet. If this is an issue, use a laser printer or have a print shop print your imagery for you. Some types of colored tissue paper also bleed.
Video of the Day