
Stair Rail Drilling Guide

Installing stair rails is one way to dress up a stairway while also improving its safety. Part of the process usually involves drilling the rail to accommodate balusters, which are the vertical rods installed along the length of the railing. Drilling a stair rail can be complicated but proper planning and using the right tools will allow you to install a professional-looking balustrade.
Measurements and Planning
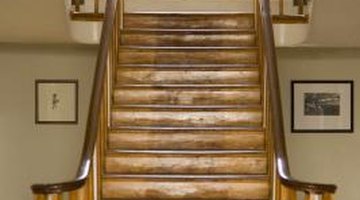
Before installing balusters or attempting to drill into a stair rail, measure the length of the rail and plan for the number and position of balusters. Balusters look best when they are installed at even intervals between the top and bottom posts that support the stair rail. This means you can find the number of balusters you need and determine their locations by measuring the rail and dividing its length by the number of treads, or steps. Create a diagram and use it to mark the underside of the rail where each baluster will be installed.
Drilling
Drilling into a stair rail to install balusters is complicated by the fact that the rail runs at an angle, while the balusters and the holes in the rail must be perpendicular to the stair treads. Drilling holes freehand is very difficult and can result in balusters that are not parallel to one another or evenly spaced. To avoid this problem, you can use a jig with a pitch block, which clamps onto the railing and hangs down toward the ground, providing a vertical guide for drilling.
Specialty Tools
Specialty rail-drilling tools provide an alternative to working with a jig and pitch block. These tools use adjustable clamps, laser guides and cradles that accommodate power drills. With your drill secured in the installer tool, you can create perfect vertical holes in a rail, regardless of its angle, by pulling a lever to raise the drill. This type of tool functions much like a portable drill press, except that it drills upward instead of downward.
Drill Press
In some cases, you can use a conventional drill press to drill stair rails before they're installed. This is only an option if your stairway design features horizontal rails that aren't installed at an angle, such as those that run along the top of a stairway or form the railing on a flat stair landing. Since you don't need to drill at an angle, you can mark the railing and produce holes on a drill press which will accommodate balusters during installation. However, the same measurements are required to ensure that your holes line up with those on angled portions of the stair rail.
References
Photo Credits
- Goodshoot/Goodshoot/Getty Images
More Articles