
How to Cut Crown Molding Corners with a Hand Saw

Crown molding is decorative molding installed on the top of a wall, covering the corner where the ceiling meets the top of the wall. To properly install crown molding in corners, you must cut a 45-degree angle on the end of the two pieces meeting in the corner.
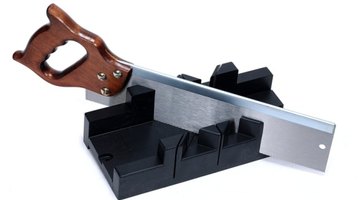
Typically, the molding is cut with a miter saw, which is a saw that rotates on a track to make angled, or miter cuts. To cut crown molding with a hand saw, you must use a miter box to ensure a straight 45-degree angle.
-
Measure the length of the wall and then measure and mark the crown molding with a pencil.
-
Place a miter box on a solid surface and place a piece of carpet pad or rubber under the box to hold it in place.
-
Insert the crown molding against the miter box so that it is upside down and away from you, as if the base of the miter box is the ceiling and the far wall of miter box is the wall.
-
Align the mark with the 45-degree slot on the miter box. If the molding is long, have a partner hold it in place so that it does not bow.
-
Insert the hand saw into the 45-degree slot on each side of the miter box to ensure a perfect cut.
-
Follow the guides in the miter box and make short, smooth strokes to cut the crown molding.
Things You Will Need
- Tape measure
- Pencil
- Miter box
- Carpet padding
- Hand saw
References
Writer Bio
Andrew Todd has been writing since 2006. He has written for the Consumer Search website and the U.S. Attorney's Office for the Middle District of Florida. Todd has a Bachelor of Science in criminal justice from the University of Central Florida.
Photo Credits
- Jupiterimages/Photos.com/Getty Images
- Jupiterimages/Photos.com/Getty Images
More Articles