Things You'll Need
Venetian plaster
Venetian plaster trowel
Primer (only if the drywall is new)
Painters tape
Steel spatula
Drywall mud
Drop cloths
100 grit sandpaper
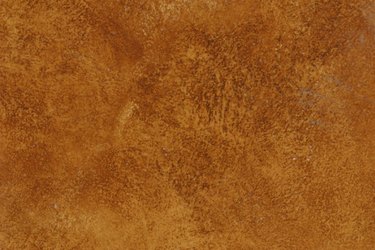
Venetian plaster is a faux finish technique for house painting, where the wall surface is painted using a trowel and a thick paint material called venetian plaster. Venetian plaster creates a unique marble or stone-like appearance, with interesting variation in color. When light penetrates the venetian plaster surface it will look very smooth and the surface is actually very smooth to the touch. Creating a faux finish such as venetian plaster is a little time consuming, but with some practice you can give your walls a new and impressive appearance.
Step 1
Choose the colors for your venetian plaster. A good general rule of thumb is to use colors for your walls that you would readily wear on your person.
Video of the Day
Step 2
Purchase your venetian plaster and faux finish supplies. You will need to find a container of venetian plaster, trowels and a steel spatula which are all available at hardware stores or paint stores.
Step 3
Prepare and protect the area before you begin working with venetian plaster. Repair any holes in the wall with drywall mud, and cover the baseboard with painters tape. Remove outlet covers and protect the floors with drop cloths.
Step 4
Practice venetian plaster faux finish techniques on a sample board first, before proceeding to the walls. This can be a scrap piece of drywall or a piece of plywood.
Step 5
Scoop out a small amount of venetian plaster and apply it to the sample piece. Apply the venetian plaster in an overlapping pattern or an "x" motion. Work in small sections and avoid leaving clumps or heavy edges of venetian plaster on the surface. Continue overlapping the venetian plaster until you have spread a thin coat on the entire surface. You don't have to completely cover the surface yet for the first coat. It's okay to let some parts of the wall show through. Keep your edges random to avoid leaving a pattern as you move across the wall.
Step 6
Let the first coat of venetian plaster dry for at least 1-4 hours. The surface will appear to be lighter in color once it has dried. Darker wet spots of plaster will need to dry completely before proceeding.
Step 7
Wash off any dried pieces of venetian plaster from the trowel. If you don't clean the trowel, the pieces will fall into the fresh venetian plaster container and leave noticeable marks when you apply the next coat.
Step 8
After the initial coat of venetian plaster has dried, begin applying the next coat. Scoop up a small amount of wet venetian plaster with the trowel again. Holding the trowel at a 90 degree angle, skim the surface and fill in any lower leveled areas with venetian plaster. This faux finish technique gives the appearance of a smooth and leveled surface. After the entire surface is coated, allow time to dry again. If you want to have more depth or texture on the surface, repeat this step and apply a third or fourth coat of venetian plaster.
Step 9
Now apply the final coat to complete the faux finish. Lightly polish the surface in circular motions with a piece of 100 grit sandpaper or a hand sander. You can also use the trowel to get a more polished appearance. Hold the trowel almost flat against the wall and rub rapidly in a circular motion while applying pressure. This is called burnishing the surface. The longer you burnish the surface with the trowel or sandpaper, the more sheen or polished appearance it will have. Remember to keep the trowel free of dried venetian plaster pieces that can leave marks on the surface while burnishing.
Step 10
Now take your faux finish technique and apply the venetian plaster to your walls. It's a time consuming process, but you can experiment with it to make it look just right. If you want the walls to have more texture and dimension, add more venetian plaster and burnish the surface again.
Tip
Always keep your trowel clean while working with venetian plaster Prime the walls, if they are brand new, before applying venetian plaster
Warning
Don't leave clumps or piled up edges of venetian plaster on the wall Don't push too hard when burnishing the surface of the venetian plaster
Video of the Day