Turn your favorite flower blooms into preserved keepsakes by pressing them in wax paper. Blooms out of your own garden or flower petals from a bouquet of cut flowers work equally well; the main thing to remember is that flat blooms work best. Both fresh or dried flowers may be sealed in wax paper; experiment with some of each for variety.
Picking the Perfect Blooms
Video of the Day
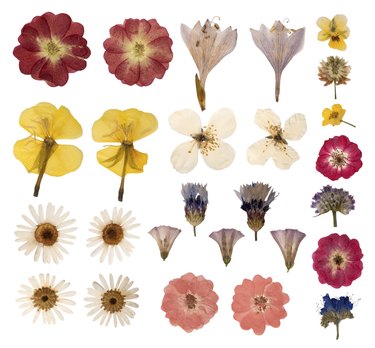
If you've ever kept a vase of cut flowers past their prime, you've probably noticed that some flowers retain color as they dry, while others turn brown or fade quickly. The same holds true when preserving flowers. The flowers that retain color the best are those with relatively thin blooms. Avoid flowers with succulent stems or leaves, as the water content will cause the flowers to turn brown. Daisies, violets and many wildflower varieties with small blooms preserve well, while tiger lilies do not, for example. If collecting flowers outdoors, pick them at their peak and while they are dry -- not after a rain or while they are covered with dew. A few thin leaves or parts of stems may also be included for added beauty.
Video of the Day
Drying the Flowers First
While it is not necessary to dry flowers before preserving them between sheets of wax paper, drying them in a homemade flower press flattens them, making them more suitable for projects such as bookmarks or homemade cards. Place flowers on sheets of plain newsprint or white tissue paper, arranging them exactly as you want them to appear when dried. Place several more sheets of paper on top; then place the sandwiched flowers inside or beneath a heavy book. If drying a bunch of flowers, allow at least 1/2 inch worth of book pages from one "flower sandwich" to the next. Place several more heavy books atop the first; then allow the flowers to dry in place for at least a few days before checking on them. It may take a week or two for the flowers to dry out completely.
Wax Paper Pressing
Wax paper provides another means of pressing flowers with weight -- no tissue paper or newsprint needed. Arrange the blooms in the desired fashion on a sheet of wax paper; then place another sheet of wax paper atop it. Set a heavy book atop the wax paper, adding even more weight on top of the book, such as a weightlifting weight or additional books. After a week or so, remove the dried flowers from the wax paper to save in a scrapbook or to use in a crafting project.
Heat-Sealed Flowers
Preserve even fresh blooms between sheets of wax paper with a method that may call to mind an elementary-school project. Place a sheet of craft paper on the work surface or ironing board, followed by a sheet of wax paper. Arrange the fresh blooms atop the wax paper; then place another sheet of wax paper atop the flowers. Cover the top sheet with another sheet of craft paper; then iron the paper with a low-heat setting and no steam, moving the iron around slightly for 15 to 30 seconds. Move the iron away; then gently pull on the top wax-paper sheet to see if it fused into the bottom sheet, after allowing it to cool for a few more seconds. If the wax paper isn't fused together, iron it again. Always place the craft paper atop the wax paper -- and beneath the bottom wax paper sheet -- to protect both the iron and work surface from melted wax.
- New York Botanical Garden: Tip of the Week: Techniques for Pressing Flowers
- She Knows: How to Press Pretty Flowers
- Longwood Gardens: How to Press Flowers and Create Handmade Greeting Cards
- Clemson Cooperative Extension: Drying Flowers
- Care 2: How to Make Beautiful Pressed Flowers
- Yankee Magazine: How to Press Flowers