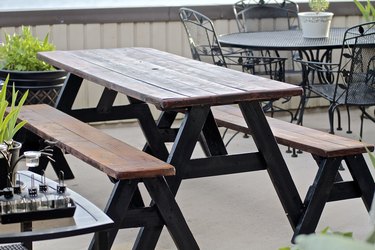
You may not have to throw away that old picnic table yet. Although it sat outdoors in all kinds of weather through the years, its stain has long since become useless, and sitting on it requires a certain level of bravery, there may still be hope for it. You can resurrect that old table with a bit of effort and create new family memories with it. It just takes a little effort and a handful of supplies that'll cost far less than a new table.
1. Clean the Table
Video of the Day
The first step toward restoring a picnic table is to assess its condition, which calls for garden hose cleanup with a bit of soap and a bristle brush. Use bleach to kill and remove any mildew. There's no need to scrub it down to bare wood or break out the pressure washer. Depending on the state of your table, a pressure washer may do more harm than good.
Video of the Day
Once enough dirt and mildew are out of your way, take note of any soft spots on the wood surfaces, the board ends, and the bottoms of the legs. You'll address these issues a little later.
2. Tighten or Replace Hardware
As a result of shrinking wood and rusting bolts, old picnic tables are notorious for becoming wobbly over time. Replacing the hardware will restore a rickety table to a solid one.
Remove a bolt from one of the benches and one from the table's top to determine their sizes. Getting them out may prove difficult if they're severely rusted. Use a hammer, prybar, pliers, hacksaw, or whatever you need to remove them.
Purchase replacement exterior-grade bolts. Remove and install the new hardware one bolt at a time.
3. Remove Loose Paint or Stain
With a scraper, five-in-one painter's tool, or putty knife, scrape away any loose paint or stain. A wire brush may come in handy as well. If you're feeling ambitious or you've chosen a clear finish coating for your table, you may choose to use a chemical stripper to remove every last bit of finish.
4. Address Wood Rot
For severely deteriorated board ends, cut off an inch or two with a circular saw. Remove the same amount of material from each board to maintain uniformity. Replace any boards that are rotten all the way through.
For all other rotted areas or if rotten end grains remain, use water putty wood filler or an all-purpose wood filler to fill the holes. Allow the filler to dry completely.
5. Create a Smooth Surface
Use a power sander and coarse sandpaper to remove excess wood putty and create a flat, smooth surface. Continue sanding with finer sandpapers down to 80 or 100 grit until leftover paint edges feather into the surface and bare wood spots are uniformly smooth.
6. Apply a Finish
Remove the sawdust from all of the table's surfaces. Apply an exterior opaque wood stain or your choice of transparent stain or paint color and allow it to dry completely before use. To add another level of convenience and comfort to your table, add a hole for a table umbrella with a hole saw or Forstner drill bit.