When the water won't run from the gleaming tap in your home, the culprit could be an easy fix on the water pump pressure switch. While there are quite a few reasons that a well might stop its function, it's more than likely due to a break in the equipment. If your home sits on a private water well, it could be up to you to determine why the flow isn't rolling through the pipe.
First Line of Repair
Video of the Day
There are a few quick fixes that you can check in order to get the water to run again. The first line of business is to check the power that runs to the well. It could be a short. Check the well water pump breaker located in the electrical breaker box to see that it hasn't simply slipped. If it has, you may need to do some further investigating to find out why the breaker tripped. If the breaker is fine, the pressure gauge on the well's tank should be checked to see that it reads over 40 psi. If not, it could be that the filter needs to be cleaned or changed. Make sure the gauge itself isn't damaged or stuck.
Video of the Day
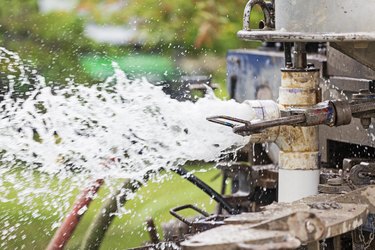
Water Pump Issues
If you have no water pressure from the well then you may have a problem with the well pump. If the water pressure is low or discolored, or even if it is gushing from the tap, the well pump is often to blame. A broken wire in the pump or leading to the pump can also cause a short in the pump. This short could also be why the breaker is tripping if it only does it intermittently. Lightning can damage a pump line, as well as vermin or advanced age.
Water Pump Pressure Switch Troubleshooting
Well pump repair can be approached by a non-professional by looking over the equipment to see if there is a simple solution. If you have a one-post pressure switch, turn the nut clockwise to increase the cut-off and cut-on pressure. To increase the cut-off and cut-on pressure for a two-post switch, turn the main nut clockwise one turn, which will increase the rate by 2.5 psi. Do not handle the secondary nut unless you want to only raise the cut-off pressure. To lower the pressure on both the one-and two-post switches, turn the main nut counterclockwise. If the water pump pressure switch needs repairing, it can be a complicated process. For replacement of electrical parts, you may want to consider calling a professional.