
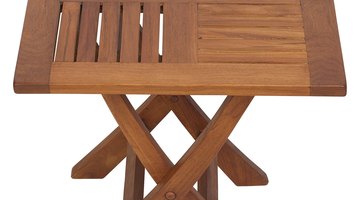
How to Build Folding TV Trays?

A folding TV tray can be very useful in the living room, letting you eat in comfort while relaxing on the couch before you fold it up and slide it away in an out-of-the-way space. A wooden TV table goes one better than the traditional metal design.
Things You Will Need
- 1/2-inch by 2-inch lumber
- 1/2-inch by 1 1/2-inch lumber
- 1/4-inch by 2-inch lumber
- 1-inch dowel
- 3/16-inch dowel
- Tape measure
- Pencil
- Saw
- Bow compass
- Router
- Drill
- Glue
- Carriage bolts, nuts and washers
- Wrench
Tip
Sand all the ends of the wood after cutting.
It's not only functional, but also an attractive piece of furniture than can be used inside the house and out in the garden.
Making the Legs
-
Check that the wood you use is true thickness, that is, exactly as thick as it’s listed as being. Measure and cut four lengths of 1/2-by-2-inch lumber, 28 inches long. Draw a semi-circle on the ends of each piece with a compass and round the ends with a router.
-
Measure and mark the center point of each piece and wood and drill a 1-inch hole in each.
-
On one pair of legs, drill a ¼-inch hole centered on the radius of the semi-circle. Countersink a 3/8-inch hole to accommodate the head of a carriage bolt.
-
On the other pair of legs drill a ¾-inch hole centered on the radius of the semi-circle. Use a tape measure to extend the hole at 45 degrees to the radius and cut with a saw so that the lumber is notched to the center hole; these notches will fit into bolts on the underside of the table top when the table is unfolded.
Assembling the Table Top
-
Cut six 12-inch lengths of the 1/4-by-2-inch lumber and line them up next to each other so that the ends are even; this will be the table top.
-
Cut two 15-inch lengths of the 1 1/2-inch lumber for the table top supports. Center each piece 1 1/4 inches in from the sides of the table top and glue in place.
-
At one end of the supports, drill a 1/4-inch hole positioned 1 inch in and 1 inch down from the edge. Drill the same size hole at the other end of the supports, but this time 1 inch in and 3/4 inch down.
Assembling The TV Table
-
Measure and cut the 1-inch dowel so it’s 12 1/4 inches long, then cut four lengths of the 3/16-inch dowel, each 1 1/2 inches long.
-
Connect the two legs without notches to the table support at the holes 1 inch in and 1 inch down and hold in place using 1 1/2 inch carriage bolts; countersink the bolt heads in the holes you made. Run the 1-inch dowel through the holes in the center of the legs. Push the other two notched legs outside the attached legs, ensuring an equal amount of space on the dowel outside each pair of legs.
-
Drill 3/16-inch holes through the dowel, positioning the holes just outside and inside each pair of legs. Push a piece of the 3/16-inch dowel through each of the holes so that a little protrudes on each side to act as pegs which will keep the legs in place next to each other and give stability to the folding table.
-
Thread a nut and washer onto a 2-inch carriage bolt and push the end of the bolt through the remaining hole on the table support. Attach a washer and nut on the other side and tighten, leaving enough thread outside the support for the notch on the table leg to hook onto. Repeat for the other notched table leg.
References
Writer Bio
Chris Nickson has been a writer since 1994. He is the author of more than 30 books, including biographies and novels, and has written extensively on topics from music to DIY.
Photo Credits
- Hemera Technologies/PhotoObjects.net/Getty Images
- Hemera Technologies/PhotoObjects.net/Getty Images
More Articles