
How to Restain Oak Cabinets

Oak kitchen cabinets set the tone for the overall look of your kitchen. Over time, your cabinets will exhibit wear and tear and give your kitchen a dull appearance. Restaining your cabinets is a great way to refresh the decor without costing a lot of money or requiring a great deal of effort.
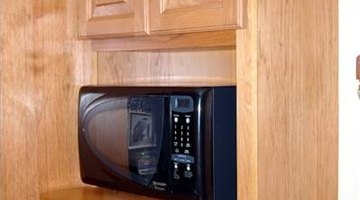
How to Restain Oak Cabinets
-
Remove any drawers or doors on your cabinets. Use the screwdriver to remove any non-wood materials such as hinges and handles.
-
Place a dropcloth underneath your work area. Chemicals such as stain and paint stripper will damage floors and carpets.
-
Apply a thin coat of paint stripper to the cabinets with a clean brush. Allow the stripper to sit for approximately 20 minutes.
-
Remove the original stain finish with a plastic putty knife. Scrape the surface of the cabinets until all the old stain has been removed. Don't use a metal scraper, as it will damage the surface.
-
Wipe the surface of the oak cabinets with a soft, damp cloth to remove any excess chemicals. Wait until it is completely dry.
-
Sand the entire surface of the cabinets with 400-grit sandpaper. Make sure you sand with the grain until the surface is smooth and clean of the original stain finish.
-
Apply a coat of wood conditioner to the entire surface with a clean brush. This will ensure the new stain absorbs evenly into the wood. Allow the cabinets to completely dry.
-
Apply a thin, even coat of stain to the entire surface of the cabinets with a clean brush. Wait until the first coat is dry before applying further coats. Continue to apply coats until the new finish achieves your desired depth and darkness.
References
Tips
- Water-based stains work well with oak because it is a very dense wood.
Warnings
- Work in a well-ventilated area when using chemicals such as polyurethane and stains. Wear gloves when working with caustic chemicals.
Writer Bio
Hubert Oresco is a writer with over one year of experience. He has written for Demand Studios and several other online clients, including quizwinners.com. He has a degree from SUNY New Paltz. He lives and works in New York City.
Photo Credits
- morguefile.com
More Articles