The popularity of Dremel's line of rotary multitools is largely due to the remarkable variety of bits and accessories available for it. Learning to change a Dremel bit, then, is one of the very first skills you'll need to learn after your purchase. There are a few different ways to go about it.
Ways to Change a Dremel Bit
Video of the Day
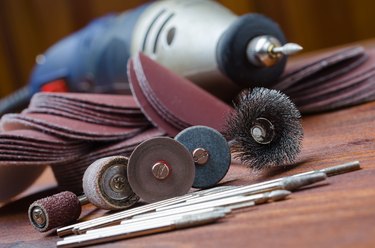
The heart of the Dremel rotary multitool is a high-speed brushless electric motor that turns a central shaft at speeds of up to 35,000 RPM in some models. A variety of bits and accessories harness that rotary motion, so a single Dremel can be used for sanding, grinding, drilling, cutting and many more functions.
Video of the Day
There are three main methods for changing the Dremel bit: using the standard collet-and-nut method, the MultiChuck or the EZ SpeedClic system. The standard method is straightforward but less convenient if you need to frequently swap accessories. The MultiChuck and EZ SpeedClic systems offer a more convenient way to exchange compatible accessories, but not all accessories are compatible.
Collet-and-Nut Method
The collet-and-nut method uses two separate pieces as well as the Dremel bit or accessory you wish to attach to the multitool. The first is the collet itself, which fits into the Dremel's shaft and is sized to hold a specific range of accessories. The standard size is 3.2 mm, but collets are available in other sizes including 2.4 mm, 1.6 mm and 0.8 mm. The threaded nut fits over the collet and tightens to hold the accessory firmly in place.
- Choose the accessory you wish to use. Its shank will correspond to one
of the four collet sizes. Select the correct collet for your bit.
- Unplug the Dremel if it's a corded model or double-check that it's turned off if it's a cordless model. Hold down the shaft-lock button to immobilize the shaft.
- Loosen the collet nut using the supplied wrench and set it aside. Remove the current collet if it isn't already the correct size for your accessory. Replace the collet nut but don't tighten it yet.
- Insert your Dremel bit or accessory into the collet and retighten the collet nut with the wrench. Release the shaft-lock button and plug in the multitool or switch it back on.
Some newer Dremel models have the company's EZ Twist Nose Cap, which serves as a tool to tighten the collet nut. If you own one of those models, you won't need to use the wrench.
MultiChuck Accessory-Changing Method
The Dremel MultiChuck accessory attaches to the multitool's shaft, and it looks and works very much like a scaled-down version of the keyless chuck found on most modern corded and cordless drills.
- Select a Dremel bit or accessory you wish to use.
- Unplug the multitool if it's a corded model or switch it off if it's cordless. Hold down the shaft-lock button to immobilize the shaft.
- Loosen the threaded sleeve of the MultiChuck and remove the current bit or accessory from the Dremel. Set it aside for repeat use or return it to its storage location if you won't be using it again.
- Insert the shank of your selected Dremel bit or accessory into the MultiChuck. Tighten the sleeve of the MultiChuck with your hands until it is as tight as you can comfortably make it.
- Turn the multitool back on or plug it in if it's a corded model.
Simplified Dremel Bit Attachment Systems
The EZ SpeedClic system is an option that's now widely available for select Dremel accessories. It consists of a mandrel that inserts into the shaft of the multitool and interchangeable wheels and other accessories that work with the mandrel. Accessories simply click and twist into place, making for easy removal and replacement.
The Dremel 4200 has another simplified accessory-change system called EZ Change, which may appear on other models in the future. The nose of the 4200 has a pull-down lever on either side. To exchange accessories, simply pull down on both levers, remove the old accessory and position the new accessory. When you release the levers, the accessory is held firmly in place.