Installing a horizontal rot board at the bottom of your privacy fence can add years to its life. Also called a baseboard or kick board, the rot board allows you to elevate the pickets, which keeps them from wicking up any ground moisture that can lead to rot. The weather can take its toll on wood fences, and those built with the pickets sitting on the ground typically need the pickets and sometimes the entire fence replaced every several years. On the other hand, if your fence has rot boards and they become damaged, you simply replace them to extend the life of the fence.
To make this DIY project as easy as possible, install the rot board during the initial construction of your fence, prior to attaching the pickets to the rails.
Video of the Day
Video of the Day
Things You'll Need
How to Install a Rot Board on a Privacy Fence
Step 1: Calculate How Many Boards You'll Need
Determine the number and length of all required two-by-six rot boards. This depends on how far apart you've set the fence posts -- typically 8 feet apart on center. Count up the number of sections -- from post to post -- to determine how many 8-foot boards to purchase. Note that the first section from a starting post and the last section to an ending post require a board slightly longer than 8 feet.
This is because each board's end must be flush with the outer side of the starting and ending post, which requires a longer board. To accommodate this, purchase a few 10-foot boards to be cut to size.
Tip
To avoid running short of material, purchase a few extra boards. If you save the receipt, you can always return the unused boards.
Step 2: Cut the Board
Stretch a tape measure from the outer side of the starting end post to the front and center of the next post. With a pencil, transfer the measurement to one of the longer, 10-foot boards. Wear work gloves and safety glasses or goggles for protection and use a circular saw to cut the board to size.
Step 3: Adjust and Level
Set the board's narrow edge on the ground with its wider side against the front of the end post and the next post. Adjust it so its end is flush with the outer side of the end post. Set a level on the top of the board to check for level. For minor changes in slope, take a shovel and add or remove small amounts of dirt until the board is level. To attach the board, take a drill and drive two 2 1/2-inch deck screws through the face of the board into each post.
Step 4: Set and Butt
Take an 8-foot board, set it on its edge and butt the end against the end of the board you just installed. Position the wider side of the other end against the next post. Check for level and if necessary, make adjustments. Make sure the tops of the boards are flush with each other at the joint and attach it to each post with deck screws. Continue the process until you reach a corner post.
Step 5: Measure, Cut, Attach
Measure from the face of the last rot board you installed at the corner to the front and center of the next post. Cut the next 8-foot board to size. Set the board on its narrow edge, butt one end against the face of the last rot board you installed and position the wider side of the other end against the front of the next post. Check for level and make any necessary adjustments.
Attach the board to the face of the last installed board and to the post with decks screws. Continue around the entire fence until you reach the last section.
Step 6: Set and Butt the Board
Take one last measurement from the end of the previous rot board to the outer side of the end post. Transfer this measurement to a longer, 10-foot board and cut it to size. Set the board on its narrow edge, butt it up against the end of the previous board and check for level. With the tops of the board flush with each other at the joint and the other end flush with the outer side of the post, attach it to the posts with decking screws.
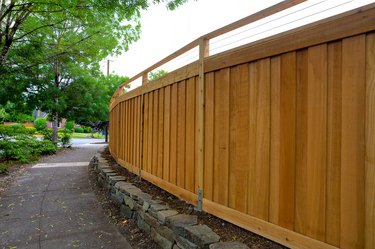
Step 7: Install Pickets Against Rot Boards
Install the fence pickets with their ends butted against the top edges of the rot boards.