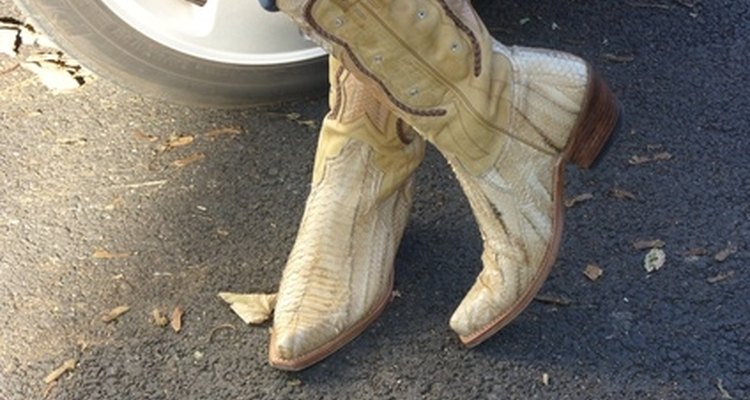
Though it might shock any respectable cowboy to know it, his boots were probably descended from the Hessian boots worn by Regency dandies in England. Of course, the boot underwent some variations when it came to America, and in the 1890's became what we all consider cowboy boots today. You want some cowboy books made of snakeskin? Make 'em yourself.
Measure the calf and foot of the wearer for whom the boots will be made.
Select the snakeskin you will use for the boot. Snakeskin is available through shoe supply companies, or online through such retailers listed at EC Plaza.
Choose a style for the heel and toe. You can find these by looking at other boots in stores or online.
Design the boot tops and how they'll be cut.
Create paper patterns for the boot tops. The parts of the boot tops consist of the lining, the front, the back stay (a strip of leather that gives the boot stiffness and support. It runs from the top to the bottom on the inside of the boot), and pull-straps (you can hook boot hooks or your fingers into these straps to aid you in pulling on your boots). Place your patterns for the above pieces on the snake skin, trace around them, adding a seam allowance, and cut them out.
Skive, or shave down any of the edges of the tops that are too thick, burning away any excess skin. Put the pieces of the snakeskin boot top together with cement. Add a beading, or a rounded strip of the snakeskin, along the top edge of the boot. Sew the tops and boot-straps with decorative stitching.
Draw a pattern for the vamp, or the portion of the boot that holds the foot, and use it to cut out the leather. Do the same to create the lining for the snakeskin boot.
Wet the vamp and stretch it and the lining over the crimping boards, a thick piece of wood that resembles the shape of a tube sock. Nail the vamp and lining in place and leave it for a few days. This ensures that the leather won't stretch any more. Attach the vamps and lining to the tops, and trim any excess.
Use hard leather to make a counter, the piece that fits over the heel, and a counter cover. Cut the pieces out and fit and cement them to the boot top. Skive (see Step 6) the heel counter as needed. Cement then sew the counter and the counter cover to the boot top, and trim any excess.
Make a side welt or piping from snakeskin and cement then sew it together. Make the seams flat by rubbing them down. Sew on the pull-straps, then turn the tops right side out.
Find a lasts (wooden model for the feet) that most closely matches the measurements of the wearer, and build up the lasts with leather if needed. If you cover the lasts with leather, make them smooth before continuing. Nail the insoles to the bottom of the lasts, and trim them as needed. Cut channels into the insoles for the welts. Make welts out of strip of heavy leather, and sew it into place around the space between where the upper joins the insoles.
Wet the vamps and covers, and stretch them over the lasts. Anchor them with tacks. Push the vamp leather down, and put the toe boxes into place. Cement the toe boxes (the heavy leather that contains the toes) together, smooth them, and pull the vamps over them to keep them in place.
Punch holes in the insoles using an awl. Stitch the welt to the insole with thick thread. Trim the seams and flatten them. Sew in the shank, or portion that supports the wearer's arch. Insert pegs made of maple along the arch of the sole in rows to the heel. You can have the pegs be anywhere from one to three rows deep. The pegs hold the insole and the outside of the boot together. Insert a steel shank, then fill in the insole and the shank with pieces of leather. Shape the shank and add pegs.
Snip the welt down to the necessary width, and cement the sole to it. Trim any excess. Sew the soles and peg them. Stain around the edges of the of the sole and finish it.
Cut out pieces of heel leather to form the heels, and cement the pieces together in layers to the desired height. Nail or peg the heel pieces together and finish them with a rubber heel cap. Form the shape you wish for the heels by sanding them. Stain the heels and polish them.
Pull the last out of the boot and sand the pegs that are on the inside of the boot. Put in a heel pad, and slip those lovely new snakeskin boots onto your feet.
Related Articles
How to Make Leather Boots
How to Replace the Sole on Wolverine ...
How to Make Homemade Shoes
How to Make Apache Moccasins
How to Make Leather Men's Shoes
How to Make Mens Moccasin Boots
How to Make Simple Indian Moccasins
How to Make Cork Shoes

How to Make Sheepskin Booties
How to Use Kiwi Mink Oil to Waterproof ...

How to Repair Doc Martens
How to Make Wrap-Around Moccasin Boots
How to Soften Leather Loafers
How to Repair a Split Rubber Sole

How to Make Your Own Shoe Tree
How do I Repair Slick Cowboy Boots?

What Type of Shoes to Wear With a ...

How to Keep My Shoes From Sliding While ...
How to Wax Your Boots

How to Stretch out the Tops of Western ...
Resources
Writer Bio
This article was written by the CareerTrend team, copy edited and fact checked through a multi-point auditing system, in efforts to ensure our readers only receive the best information. To submit your questions or ideas, or to simply learn more about CareerTrend, contact us [here](http://careertrend.com/about-us).