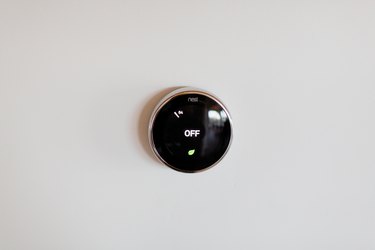
If any component of your HVAC system is not coming on, you could have a faulty thermostat. While the most convenient way to determine whether an HVAC thermostat is faulty or not is to test it with a multimeter, if you don't have one on hand you can also simply bypass the thermostat by twisting two of the thermostat wires together. This is easy to do, and because of the low voltage the wires carry from the transformer, it's also safe, although precautions are still in order.
If you know how to bypass a thermostat, you can use this knowledge to make your furnace or AC compressor work even if the thermostat isn't working. This is also handy knowledge to have when you're remodeling and you have thermostat wiring hanging out of the wall, but you haven't yet gotten around to buying a thermostat.
Video of the Day
Step-by-Step Instructions to Bypass a Thermostat
1. Turn Off the Power
Some HVAC systems have a furnace, an air conditioner, and a blower. Others have a furnace and blower and no AC unit, and still others feature a reversible heat pump refrigeration unit. No matter how many components they have, though, most systems are generally controlled by a single 240-volt double-gang breaker in the main panel. Locate that breaker in the electrical panel and turn it off.
2. Expose the Thermostat Wires
Use a flathead screwdriver to remove the thermostat cover plate. There will be a slot to place the blade of the screwdriver between the faceplate and the main body of the thermostat. Insert the screwdriver into the slot and twist slightly to pop off the faceplate. Use a Phillips screwdriver to remove the mounting screws that secure the temperature sensor inside the thermostat to the base plate. Remove the sensor to expose the thermostat wires, which are attached to the thermostat terminals on the base plate.
3. Identify the Wires
Use the standard color code. If your thermostat is the typical five-wire one used for many HVAC systems, the terminals are stamped with the letters R, W, Y, G, and C. R stands for red and is the standard color of the wire that supplies power to the thermostat. W stands for white and controls the heating system, Y stands for yellow and controls the cooling system, and G stands for green and controls the blower motor. C stands for common, and the color of that wire is either blue or black.
4. Choose Which Function to Bypass
To bypass the thermostat, you'll use the red wire to supply power directly to one of the other ones (with the exception for the common wire), so choose the function you want to test. The most useful one to start with is the blower controlled by the green wire because you can hear it when it starts. If you have a two- or three-wire thermostat, use the white wire. You don't have a choice in a two-wire system, and if there are three wires, the system is usually designed for the blower to come on automatically when the thermostat calls for heat.
Warning
Never touch the red wire and the blue or black common wire together. Doing so is likely to blow one of the fuses in the control board.
5. Twist the Wires Together
Twist the R wire together with the one you chose and then turn the breaker back on. If you chose the green wire, you should hear the blower in the air handler come on as soon as you flip the breaker. If you chose the white wire, you'll hear the furnace and blower start simultaneously, or if you have a two-wire thermostat, you'll only hear the furnace start. If you chose the yellow wire, the air conditioning system should start.
If you're doing a complete test of your thermostat, you'll want to repeat this procedure for each wire in turn (except the common). If any component — furnace, AC unit, or blower — doesn't start, that component may be faulty, or the problem may be in the control board, but it's not the thermostat. At this point, you'll need an HVAC technician for further troubleshooting.
6. Complete the Test
Turn the breaker back off, untwist the wires, and reattach them to the terminals to which they were connected. If the wires are just hanging out of the wall because you don't have a thermostat yet, just separate them. They only carry power from the transformer at 24 volts, so they won't deliver a dangerous shock if someone inadvertently turns the breaker back on.
Need to see the process visually? Check out Benjamin Sahlstrom's video below for a step-by-step breakdown:
Why Does a Thermostat Stop Working?
Every thermostat, even the one that controls the flow of coolant in an automobile radiator, has a temperature sensor. The sensor for a thermostat that controls a central air system employs either a thermistor or a bimetallic strip. It sends electronic signals to a switching device that relays the signals to the appropriate wire terminals. Low-voltage thermostats also contain circuitry that controls the sequence of operation of the system.
There are many reasons a thermostat may not pass a signal to the control board. The terminals might be dirty or corroded, the wires may not be properly connected, or the thermostat may not be mounted level. It's easy to fix these problems yourself, but internal problems are better left to a tech, who may recommend replacing the thermostat.
