Focusing on details is the best way to make a 50th birthday party elegant. Use fine china, spotless linens and sophisticated recipes to treat guests and the birthday honoree to a high-style celebration. For most people, planning an elegant 50th birthday party on a budget will mean limiting the guest list so you can spend money judiciously on the necessary elements of the event.
Location
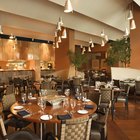
Choosing an elegant location for a 50th birthday event is half the job in creating the atmosphere of class and grace that you want. Reserve rooms at an upscale hotel or restaurant, and let their event planner help you with the china, linens and staffing. Or plan a more intimate gathering at a local vineyard, bed-and-breakfast, or a friend or relative’s vacation home. Depending on the guest of honor’s interests, perhaps a botanical garden, ski lodge, historical park or private estate would be the perfect venue for his or her 50th birthday party. See the Resources section for an event venue finder.
Food and Beverages
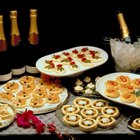
Serve crowd-pleasing, yet elegant, dishes at the birthday party. Salmon in cream sauce, crisp orange duck, or tender prime rib are traditional and classy main dishes. Adding stuffed mushrooms, caviar, baby artichokes, truffles and fine wines and espresso will complete the menu. Ask the birthday guest of honor what foods he or she likes best, and look up recipes that use the foods in an elegant presentation. If you are hosting the party at home, but a formal menu is beyond your cooking talents, consider hiring a fine restaurant’s chef for the evening, or having the food prepared elsewhere and delivered. Stock you bar and have plenty of ice on hand in advance. Ask a cocktail-knowledgeable friend to create a special mixed drink for the party in honor of the birthday guest, based on their name, hometown, favorite ingredients or colors.
Decorating
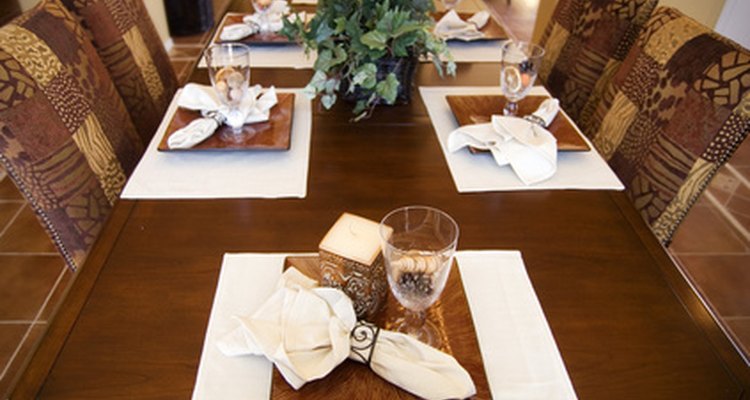
Use family-heirloom tableware, silverware and decorative glass and china pieces to decorate your tables. Fill large vases with fresh-cut flowers for centerpieces, and order more fresh flowers for other locations about the house. Arrange them wherever guests may wander; the hallways, bathrooms and living areas. While expensive, nothing is more elegant than a selection of roses, lilies and orchids. A very elegant 50th birthday color theme would be to order burgundy and deep-hued flowers with white, gold or silver accents. Light the area profusely, with elegant lanterns, chandeliers and candles. An old photo of the birthday celebrant as a young man or woman is a great image to be copied and printed onto place cards, napkin rings or favor tags.
Cake and Gifts
If you have planned a theme for the 50th birthday party, the gifts may all be vacation-related or wine-related, and the cake may be decorated to fit the theme. If the party is more free-form, decorate the cake in honor of the birthday girl or guy; elegant fresh flowers, fruits or chocolates can make an eye-catching display around their name and the date in frosting. Whatever the cake, it should be their favorite kind, whether it’s coconut, banana, red velvet or plain chocolate.
Gifts for a 50th birthday should be something truly special. Give tickets to a concert from a favorite entertainer or a world-class sporting event. For a gift with more emphasis on the thought than the expense, create a birthday scrapbook documenting all the good times you’ve had with the guest of honor, or put together a slideshow of photos to be shown at the party.
Favors
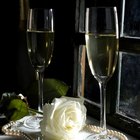
Be generous with the take-home items for your guests; it is always appropriate to be giving toward your friends and relatives. Present each with a bottle of fine wine, champagne or liqueur with a personalized label or box honoring the 50th birthday, or offer a 50th-birthday themed etched-glass candle holder with a pillar candle inside. You may wish to have silver bracelets engraved for the female guests, and present the male guests with matching engraved key fobs, corkscrews or cuff links. Or, present guests with homemade or specially ordered candies in take-home boxes, patterned with flowers or pinstripes and accented with vellum or thin silk ribbons. See the Resources section for more ideas.
Related Articles
Caribbean Theme Party Ideas

Hawaiian Gift Basket Ideas

Fun 4-Year-Old Girl Birthday Parties ...

What to Bring My Boyfriend's Mother for ...

Ideas for Your 30th Birthday in Boston
Formal Dinner Menu Ideas
Ideas for Sending a Husband a Gift at ...

40th Birthday Ideas for Your Wife
50th Anniversary Finger Food Ideas
What Things Will You Need to Have for a ...

25th Anniversary Party Checklist

Favor Ideas for a 75th Birthday Party
Ideas for a 31st Year Anniversary Gift

How to Request Donations Instead of ...
How to Decorate a Restaurant for a ...

How to Cater Your Own Party

Five-Year-Old Birthday Party Ideas for ...
French Wedding Gifts

Bachelorette Party Ideas for the Mormon ...
Alternatives to Flowers for a Man
References
Resources
Writer Bio
Kim Hoyum is a Michigan-based freelance writer. She has been a proofreader, writer, reporter and editor at monthly, weekly and daily publications for five years. She has a Bachelor of Science in writing and minor in journalism from Northern Michigan University.
Photo Credits
elegant home dining table image by Paul Hill from Fotolia.com