There are a couple of ways to create a skull and crossbones in Windows. If you want to type the symbol when you're working in an MS Office program, use a keyboard shortcut. Alternatively, use your computer's Character Map to create a copy that you can then paste in your work.
Use a Keyboard Shortcut
Windows converts some keyboard shortcut commands into symbols. To insert a skull and crossbones, hold down the Alt key and type the numbers 9760 on the number pad on your keyboard. Release the Alt key to insert the image in your document.
Video of the Day
Video of the Day
If you're using a laptop without a number keypad, you may still be able to use this Alt-code command if your keyboard has a Function key (a key with a blue Fn on it) and numbers printed on some of your letter keys. Hold down both the Fn and Alt keys and type 9760, making sure to use the letter keys with numbers on them rather than the number line at the top of the keyboard.
Use Character Map to Copy and Paste
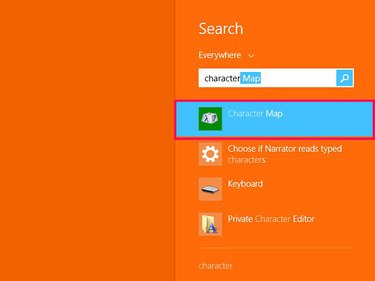
Use the Windows Character Map to copy and paste a skull and crossbones from fonts on your computer. From your Start screen in Windows 8, type character map and select the tool. In Windows 7, open the Start menu, type character map in the search box and open it when it appears in the Programs area.
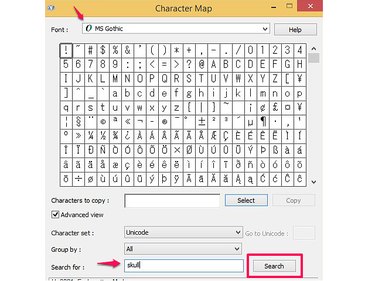
Select the font from which you want to copy a skull and crossbones. Fonts such as MS Mincho and MS Gothic have the default version of the image, a line drawing of a skull and crossbones; Wingdings has a black alternative. When you've chosen a font, type skull into the Search For bar and select Search to find the character automatically. Or, scroll through the list until you find it.
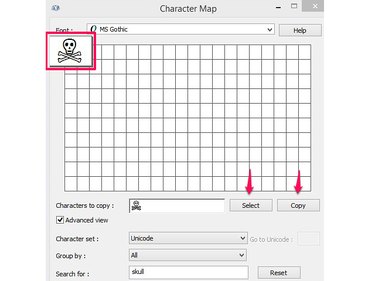
Select the character to make it pop up out of the list. Use the Select button to add it to the Characters to Copy box. Select Copy to place the skull and crossbones on your computer's clipboard ready to paste into the application you're using.
Download Free Fonts
If you want more skull and crossbones choices, consider downloading free fonts that have a pirate theme or that contain relevant images. There are various online collections you can use to search for fonts, such as Dafont, FontSpace and FontZone. If you don't see many results for a skull and crossbones search, try using individual words, such as skull, crossbones or pirate.