Central air conditioning systems have condensate drip pans that collect excess water that is created when heat and moisture are pulled from the air. If you have this kind of unit, you should know how to replace the drip pan in a central air conditioner. The location of the air conditioner drip pan depends on the type of system you have.
Air Conditioner Drip Pans
Video of the Day
These pans are an extension of the air conditioner's evaporator coils. These coils resemble car radiators but in a box. Liquid refrigerant gets measured out and allowed to evaporate into finned tubing, and this is where it is transformed from liquid to gas. This then cools the coil and the air that gets blown across it.
Video of the Day
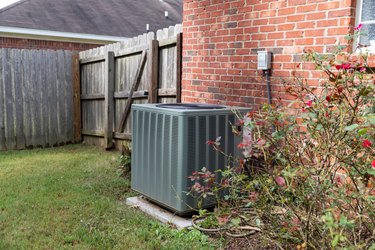
Evaporator coils are generally found inside the unit's air handler. In vertical or upright units, the evaporator coils are on top, and the condensate drain line is beneath. In horizontal units (found in attics), the coils are next to the air conditioner. Attic HVAC units should have two drip pans (with separate drain lines) for extra protection in case of water leaks.
Drip pans do not last forever, and sometimes, they need to be replaced. If your drip pan is old or corroded, it can develop holes and cracks. Allowing this situation to continue can lead to significant water damage, so it is best to know how to replace the drip pan.
Replacing the Drip Pan
To buy a new drip pan, find the AC system's make and model number and have this information handy when shopping. As an alternative, you can remove it before looking for a replacement. This project is fairly uncomplicated and requires pliers, a wrench, rags, work gloves and the new pan. Turn off the power supply to the system before beginning work. When ready, remove the unit's access panel and have a look at the coils and drip pan.
Check how the pan is attached; it could be via clips or screws. Some of these pans are actually welded in place; in this case, you will have to call an HVAC professional for help. Otherwise, disconnect the drain line from the pan with your pliers or wrench. Unscrew or unclip the drain pan and carefully lift it out since it may be loaded with water or covered in mold. Have an extra bucket handy just in case.
Slide in your new drip pan, screw or clip it in place, and attach it to the drain line. Then, close the access panel and turn the power back on. If there is a second drip pan, it can be replaced in much the same way.
Drip Pan Full of Water?
Often, the drip pan itself is just fine but is filled with water for other reasons. For example, frozen evaporator coils can cause water to accumulate in the pan. Why do evaporator coils freeze? One reason is low refrigerant levels, a result of refrigerant leaks in the system.
Another common reason for an overflowing drain pan is clogged drain pipes. They get jammed from excessive condensation, dirt and debris. If you find that you are repeatedly emptying full air conditioner drip pans, the problem could be more serious than you think. After you have emptied it the first time, check it again in a day or so and see if it has filled up again. This could also be a job best left to the professionals.