"Natural" does not always mean healthful, something that becomes obvious in the delicate environment of a saltwater aquarium. Ammonia is a natural product of organic waste, but in the confines of a tank it can be lethal. Keeping levels under control requires regular attention—a saltwater aquarium is not something that can be set up and then left alone for weeks at a time.
About Ammonia
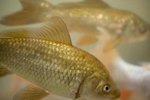
Tiny amounts of ammonia may come from the water and the salt mix, but the primary source is your animals. The organisms that excrete waste, i.e., fish and invertebrates (but not algae), are also producing a continuous supply of ammonia. The same goes for uneaten fish food and dead animals. In a healthy aquarium the ammonia is converted to nitrites and then nitrates through bacterial action. Nitrate is not particularly harmful except in large amounts, and much of it is normally used up by algae and microorganisms in a saltwater tank, and plants in a freshwater one.
When Ammonia Kills
Ammonia not only smells foul, it is also extremely toxic. It causes burns on terrestrial animals—it’s behind those painful urine burns sometimes found on babies and sick pets—and kills aquatic ones. The ammonia concentration needed to rapidly kill your fish and invertebrates is pretty small, as little as 0.1 parts per million for many species. Levels that aren’t instantly lethal could kill over a longer period. Obviously it is imperative to keep the stuff under control.
Build an Ecosystem
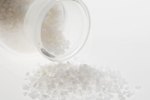
An aquarium isn’t just a cage for fish; it's a miniature ecosystem and needs a healthy community of microorganisms to function. Tank cycling involves establishing sufficient bacteria to process organic waste, a process that takes time, especially in a saltwater tank. Cycling is not something you can skip in any aquarium—pop your creatures straight into a newly set-up aquarium, and they will almost certainly die. Cycling a saltwater tank properly takes months: you must set up the tank and add water made up with the appropriate salt mix, add a culture or other source of nitrifying bacteria and something for the bacteria to feed on, add live rock, and finally add your fish and invertebrates one or two at a time. Always err on the side of under-stocking rather than overstocking a tank.
Keep Testing
Throughout the cycling process and beyond, test the tank water for levels of ammonia, nitrites and nitrates using the appropriate test kits, readily available from aquarium supply and pet stores. You will note spikes at intervals during the cycling stage, but in an established tank, levels of the first two should be undetectable. Levels of nitrates should be very low, although some creatures need slightly higher levels than others. If you see a rise in any of the three, but especially the highly toxic ammonia and nitrites, take immediate action with as many partial water changes as needed to get levels back to a safe point. Water changes are critical in this situation, although you can also use an ammonia reliever. Several products are available at pet and aquarium stores. If you use one, make sure it's suitable for saltwater tanks and note you must still conduct water changes.
Do the Housework
Emergency action should rarely, if ever, be necessary in a well-established, well-maintained tank. Aquariums are too small to be fully self-supporting for the fish and invertebrates you probably want to keep, so your aquarium care routine must include regular partial water changes. Suck up some of the water along with any debris using a gravel cleaner, tube and bucket. Replace the water slowly with a fresh solution made up with salt mix (remembering that while water evaporates, salt does not). Do not overfeed your critters. In most cases, if they leave food, you are feeding them too much or too often. Remove any uneaten food promptly (a turkey baster works well for this purpose). Also keep a close eye on your tank inhabitants, being alert for signs of sickness in your animals, and remember to remove dead animals the minute you notice them.
References
Photo Credits
-
Visage/Stockbyte/Getty Images
Writer Bio
Judith Willson has been writing since 2009, specializing in environmental and scientific topics. She has written content for school websites and worked for a Glasgow newspaper. Willson has a Master of Arts in English from the University of Aberdeen, Scotland.