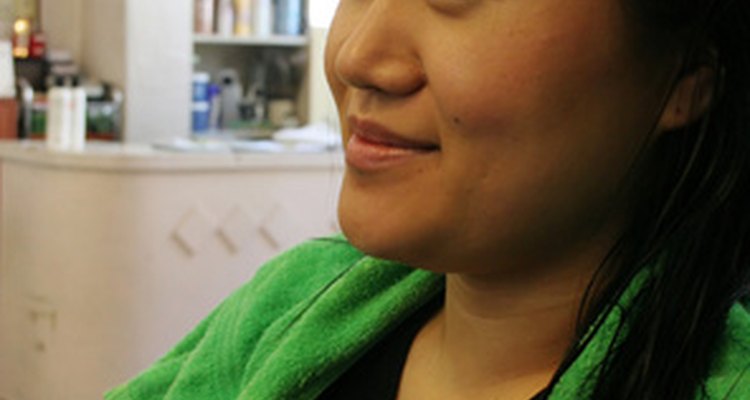
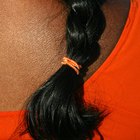
eHow launches Android app: Get the best of eHow on the go.

How To

How to Make Hair Braids

Contributor
By Debbie Dunn
eHow Contributing Writer
(1 Ratings)
Finished Braid
Finished Braid
Debbie Dunn

Braiding hair is a moderately challenging skill. There are many different types of braids to attempt. This article teaches the process of making standard braids or plaits, one on each side of your head. If you have never braided hair before, it might be easier to start out by learning how to braid ribbon, yarn, or string. Once you get the hang of alternating either the right or left side over the middle section repeatedly, than you can transfer this skill to braiding your own hair or the hair of somebody else.

Difficulty: Moderate
Instructions

Things You'll Need:

  • 3 different colors of ribbon, yarn, or string 1 yard each
  • Chair rung
  • Water
  • Comb or brush
  • A rubber band or hair tie per each braids

    Ribbon Braiding

  1. Step 1
    Attach three ribbons to a chair rung.
     
    Attach three ribbons to a chair rung.

    If this is your first time braiding hair, it might be easier to start with three different color ribbons, yarn, or string to gain practice and expertise. Cut three different colors of ribbon, yarn, or string that are 1 yard each. Line up each ribbon evenly, and attach all three to the rung of a chair.

  2. Step 2
    First three steps for braiding ribbon are pictured.
     
    First three steps for braiding ribbon are pictured.

    Divide ribbon into thee sections and pull tight. Cross the right ribbon over the middle section. As pictured, cross the green ribbon over the cream. As the author of Hair Braiding Basics on Longlocks.com states, "The original right hand section is now the middle section." Pull tight. Cross the left ribbon over the middle section. As pictured, cross the pink ribbon over the green and pull tight.

  3. Step 3
    Second set of four steps for braiding ribbon are pictured
     
    Second set of four steps for braiding ribbon are pictured

    Cross the right ribbon over the middle section. As pictured, cross the cream ribbon over the pink ribbon. Pull tight. Cross the left ribbon over the middle section. As pictured, cross the green ribbon over the cream. Pull tight. Cross the right ribbon over the middle section. As pictured, cross the pink ribbon over the green ribbon. Pull tight. Cross the left ribbon over the middle section. As pictured, cross the cream ribbon over the pink and pull tight.

  4. Step 4
    Third set of four steps for braiding ribbon is pictured here.
     
    Third set of four steps for braiding ribbon is pictured here.

    As the author of Hair Braiding Basics on Longlocks.com states, "Continue the process alternating right and left sections over the middle section, tightening each plait (in this case, braided ribbon) as you make it."

    Cross the right ribbon over the middle section. As pictured, cross the pink ribbon over the green ribbon. Pull tight.

    Cross the left ribbon over the middle section. As pictured, cross the cream ribbon over the pink. Pull tight. Cross the right ribbon over the middle section. As pictured, cross the green ribbon over the cream ribbon and pull tight. Cross the left ribbon over the middle section. As pictured, cross the pink ribbon over the green and pull tight.

  5. Step 5
    The last step of ribbon braiding is shown here.
     
    The last step of ribbon braiding is shown here.

    Continue the braiding process until your braid is the desired length. Tie off the end of the braid by knotting the ribbon.

  6. Hair Braiding

  7. Step 1
    Divide hair into three sections.
     
    Divide hair into three sections.

    For ease of braiding and to control flyaway hair, dampen or wet your hair. Comb or brush it until it is smooth. Decide on the number of braids. In this case, the model is making one braid on each side of her head. Divide the hair you wish to braid into three even sections.

  8. Step 2
    Cross the left section over middle section.
     
    Cross the left section over middle section.

    Cross the left section over the middle section and pull tight.

  9. Step 3
    Cross right section over middle section
     
    Cross right section over middle section

    Cross the right section over the middle section and pull tight.

  10. Step 4
    Cross left section over middle section.
     
    Cross left section over middle section.

    Cross the left section over the middle section and pull tight.

  11. Step 5
    Cross right section over middle section.
     
    Cross right section over middle section.

    Cross the right section over the middle section and pull tight.

  12. Step 6
    Cross left section over middle section.
     
    Cross left section over middle section.

    Cross the left section over the middle section and pull tight.

  13. Step 7
    Cross right section over middle section.
     
    Cross right section over middle section.

    Cross the right section over the middle section and pull tight. Continue the process alternating right and left sections over the middle section, tightening each plait as you make it.

  14. Step 8
    Tie off your finished braid with a hair tie.
     
    Tie off your finished braid with a hair tie.

    When your braid is the desired length, tie it off with a hair tie.

Tips & Warnings
  • The author of Hair Braiding Basics on Longlocks.com shares the following tip: "Once you understand the motions of braiding your own hair, try holding the outside sections between the thumb and index finger of each hand and moving the middle section between the index and middle fingers back and forth between both hands as the outside sections are crossed over it." The author of this article has worn her hair in two to 38 braids for years. Once you get the hang of the process, you can easily finish each braid in about two minutes. Since her hair is quite thick and flyaway, she finds it much easier and faster to braid her hair when it is wet.
Subscribe

Post a Comment

Post a Comment

Related Ads

  • Have you done this? Click here to let us know.
I Did This
Get Free Fashion, Style & Personal Care Newsletters

Copyright © 1999-2010 eHow, Inc. Use of this web site constitutes acceptance of the eHow Terms of Use and Privacy Policy .   en-US Portions of this page are modifications based on work created and shared by Google and used according to terms described in the Creative Commons 3.0 Attribution License. † requires javascript

eHow Fashion, Style and Personal Care
eHow_eHow Fashion, Style and Personal Care