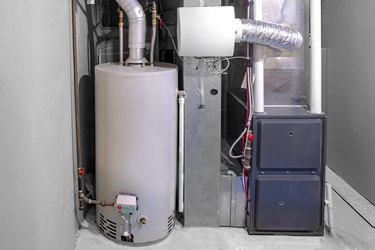
Whether you're reentering your home after a hurricane, or you had a flooded basement unexpectedly, most homeowners attempt to save as much as they can after a flood. Appliances with complex electronics (like a dishwasher or a washing machine) generally must be replaced after sitting in standing water, but simpler ones such as gas water heaters might be salvageable. A certified plumber or HVAC technician should always double check a water heater before it is re-lit after a basement flood (especially flooding that has submerged part of the burner or thermocouple). A gas valve or thermocouple that has been submerged in flood water might have to be replaced rather than simply cleaned off — something that is always safest for a certified plumber or HVAC technician to do.
Here's how to safely light the pilot for a hot water heater after a flood:
Video of the Day
Video of the Day
Things You'll Need
Broom
Toothbrush or soft cloth
Dish soap
1. Call a Certified Plumber
Before you re-light your water heater, call a certified plumber or HVAC technician so that they can double check that the water heater is still usable. They will also check to see if the thermocouple or burner need to be replaced before you re-light the pilot.
2. Turn Off the Gas Supply
Turn off the gas supply if you didn't get a chance to before the flood. Turn the gas control valve to the off position. Allow the water heater to sit until it is completely dry.
3. Clear the Debris
Sweep as much dry muck off the water heater as possible, and clean all the supply lines, the overflow line and drain with a soft cloth. Use vinegar as a cleaning solvent.
4. Clean the Burner Holes
Remove the front plates at the bottom of the tank, and clear the burner holes out with a toothbrush or other small, soft brush again using vinegar as a solvent. Allow parts to dry completely again.
5. Check the Gas Connections
Check each gas connection to make sure it is tight enough by dropping a bit of dish soap on it; avoid over-tightening gas line connections.
Tip
Call a plumber to clean the burner, check the gas valve, thermocouple, and replace the supply pipes if you don't know how to take the gas supply and burner apart. In some cases, after serious floods of long duration, it's less expensive to replace the water heater after water damage occurs than try to repair it.
Turn the gas supply back on, turn the dial on the gas valve to the pilot position and depress the push-button pilot button as you light the pilot under the burner with a log lighter. Hold the pilot button down to prime the thermocouple; otherwise it will cut the gas supply to the pilot light.
Release the pilot button, and adjust the temperature dial to vacation or pilot position. Turn the gas valve to on position, then slowly turn the temperature dial clockwise until the burner fires up.
8. Reset the Temperature
Turn the temperature valve down once you're sure the burner fires properly. Replace the front panel on the tank, and reset the temperature valve to its customary position.