
How to Make a 10X10 Concrete Slab

It’s hard work to pour concrete, but if you aren’t afraid of the labor, it is something a do-it-yourselfer can do. A big portion of the work of pouring a concrete slab is in the preparation. A good-size project to start with is a 10-by-10 concrete slab.
This size makes a good base for a patio or as the floor for a small shed. Once you understand how to do the concrete work properly for this smaller project, you can move on to pouring concrete for larger ones.
Things You Will Need
- Shovel
- Wooden stakes
- String
- Level
- 1/2-inch rebar
- 10-by-10 welded wire mesh
- Carpenter’s square
- 2-inch-by-10-inch lumber
- Nails
- Hammer
- Garden hose
- 2-foot-by-4-foot-by-12-foot lumber
- Concrete float
- Anchor bolts
Tip
Call the concrete company to arrange the day and time for your concrete pour. Have everything ready before delivery so all you have to do is pour the concrete.
Warning
Wear protective clothing when working with concrete. Wash clothing and tools before the concrete dries.
Prepare to Pour Concrete
-
Put four stakes in the ground to mark the outside perimeter. Tie string to the four stakes. Make sure the string is level and positioned where you want the top of the cement slab to lie. Square the corners using a carpenter’s square.
-
Dig enough ground away from the inside perimeter of your marked area to allow for six inches of concrete and three inches of rock. If you plan for your cement slab to have a thicker perimeter, allow for it by digging a deeper trench around the outside edge of the slab.
-
Shovel rock into the cleared area. Once you have three inches covering the entire open area, level it as best you can.
-
Place 1/2-inch reinforcing bar, or rebar, around the perimeter of the slab to help the concrete slab adjust to temperature extremes without cracking. Use 10-by-10 welded wire mesh inside the area. Suspend the rebar and mesh above the rocks by placing pieces of scrap wood underneath them.
-
Build the wooden forms for the outside of the concrete slab using your string marker as a guide. Nail pieces of 2-inch-by-10-inch lumber together. Hold the wood in place with stakes.
Pour Concrete
-
Dampen the rock base with a garden hose. Pour the concrete. Push the concrete into the corners. Compact the concrete to get an even base.
-
Use a straight 2-foot-by-4-foot-by-12-foot piece of lumber as a screed, or leveling tool, to make sure there are no uneven spots on the poured concrete. Have a partner help you work the piece of lumber back and forth across the top of the forms. If necessary, add more concrete to fill the low spots.
-
Smooth the concrete with a float. Before the concrete totally sets, you may want to put texture on the concrete using a specialty float. This gives the surface a non-slip finish.
-
Insert anchor bolts into the perimeter of the concrete slab every three to four feet if you plan to build something on top of the concrete.
-
Remove the wooden forms 24 hours after the concrete pour. Push dirt up against the sides of the concrete to blend it in with the landscape.
The Drip Cap
- It’s hard work to pour concrete, but if you aren’t afraid of the labor, it is something a do-it-yourselfer can do.
- Shovel rock into the cleared area.
- Use 10-by-10 welded wire mesh inside the area.
- Use a straight 2-foot-by-4-foot-by-12-foot piece of lumber as a screed, or leveling tool, to make sure there are no uneven spots on the poured concrete.
- Smooth the concrete with a float.
- Before the concrete totally sets, you may want to put texture on the concrete using a specialty float.
- Insert anchor bolts into the perimeter of the concrete slab every three to four feet if you plan to build something on top of the concrete.
References
Writer Bio
Denise Brown is an education professional who wanted to try something different. Two years and more than 500 articles later, she's enjoying her freelance writing experience for online resources such as Work.com and other online information sites. Brown holds a master's degree in history education from Truman State University.
Photo Credits
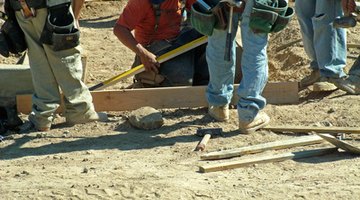
- concrete forms image by Greg Pickens from Fotolia.com
- concrete forms image by Greg Pickens from Fotolia.com
More Articles