
On top of being just plain fun, a bottle rocket project can help you learn useful building skills and scientific concepts. The long-distance bottle rocket shown here, though inexpensive and simple to make, is designed for long-distance flight. After building and testing the rocket, you may want to experiment with changes to the number of fins, their angle, the shape of the nose or other features.
- Two 2-liter bottles of soda
- 16 oz. bottle of water
- 5/8" or 3/4" wide dowel rod (about 1 meter long)
- 1 sheet of manila or construction paper
- 1 canvas board (or thick, non-corrugated cardboard)
- Roll of packing tape
- Hot glue gun (low heat is best) and glue sticks.
- 10-30 pennies
- Scissors
- Razor blade (optional)
- Permanent marker
- 1/2 meter of string (non-elastic)
- Ruler
- Freezer
- Another person (optional)
Hold the rocket in both hands. Turn you hands so that the rocket is now resting on your index fingers. Very slowly, move your fingers toward each other until they touch. Where your fingers come together is the center of gravity of the rocket. The closer this is to nose of the rocket, the more stable the rocket will likely be. Adding weight to the tip of the rocket will generally make it more stable and fly further. Experiment to find the optimal amount. Keep weight as far away from the bottom of the rocket as possible. The more weight near the bottom, the more unstable your rocket will be. Imagine you shine a bright light on the rocket. Look at the shadow produced on the wall behind the rocket. In general, the more surface area the shadow takes up near the bottom of the rocket, the better. The more surface area that is near the nose of the rocket, the worse. (This is why fins are placed as low as possible on rockets). Hemispherical noses produce less drag than conical noses. If possible, use a hemispherical nose. For a related bottle rocket article, check the resources below. For books related to rockets, check the resources.
Be careful not to get burned on the glue gun. Keep it in the same place while building the rocket so you don't forget where it is and accidentally bump into it. Be careful with cutting out the fins. Canvas board is thick. If using a razor, be sure to cut slowly with a steady downward pressure. Keep your hands in a safe location so that if you slip, you won't get cut. Don't design the fins so they overhang too much. You might have problems getting the rocket to fit on the launch pad. The nose cone will be damaged after launch. Keep a few spares with you for a quick on-site repair job. At the launch site, it's good to have a roll of duct tape with you to perform emergency repairs (like a fin falling off, or the pennies breaking off).
Empty the bottles and rinse them out. Leaving the cap off, put one of the 2-liter bottles in the freezer for about 30 minutes.
Have the cap in hand. Remove the two-liter bottle from the freezer and immediately put the cap on as tight as you can. (The cold air will warm and expand. When hot-gluing to the bottle, it won't deform as much.)
Take the 2-liter bottle that was in the freezer, and hot-glue the bottom of the 16-oz. bottle to the bottom of the 2-liter bottle. Use enough glue so that the two bottles become inseparable. Keep the bottles straight.
Take the dowel rod and fill the top of one end with as much hot glue as it will hold.
Turn it upside-down, and place it inside the 16-oz. bottle. Applying a little pressure, hold the rod as straight as possible until the glue hardens.
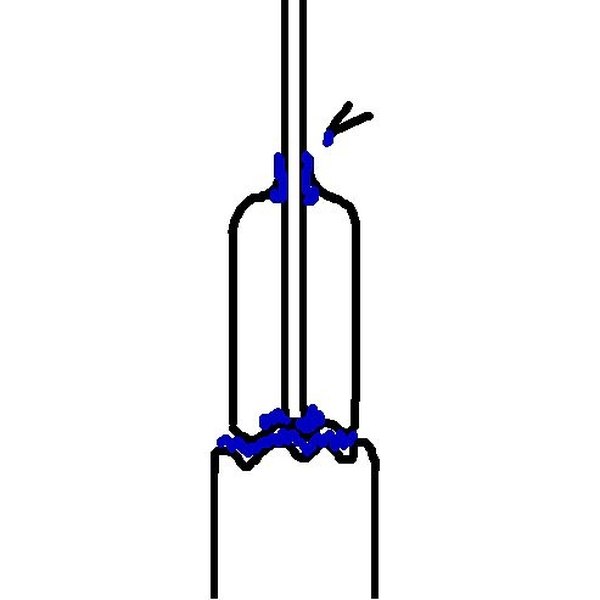
Fill the mouth of the 16-oz. bottle--that the dowel rod is now sticking through--with hot glue. Keep the dowel rod straight.

With the basic structure in place, it's time to streamline the rocket. Take the other 2-liter bottle and cut the top off. The circumference of the top circle of the cutout should be the circumference of the 16-oz. bottle. The circumference of the bottom circle of the cutout should be the circumference of the 2-liter bottle. The bottom circle's circumference should extend about 1 1/2".
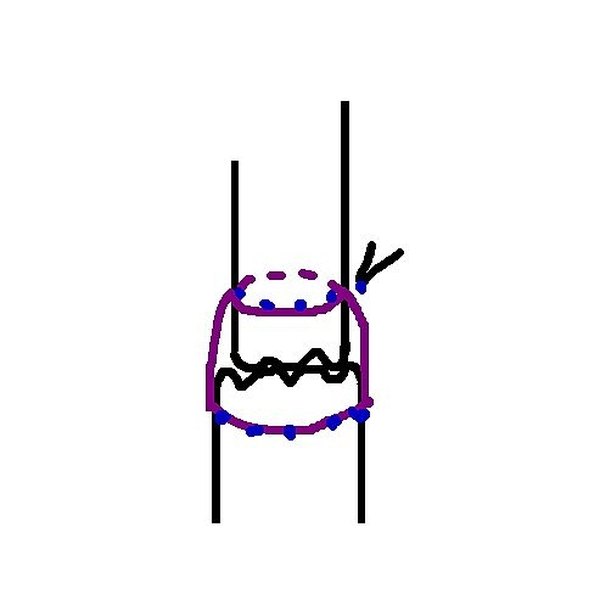
Slide the cutout down the dowel rod and over the 16 oz. bottle. Secure it in place with dabs of hot glue around the circumference of the top and bottom of the cutout.
Take a piece of construction paper, and cut it in half.
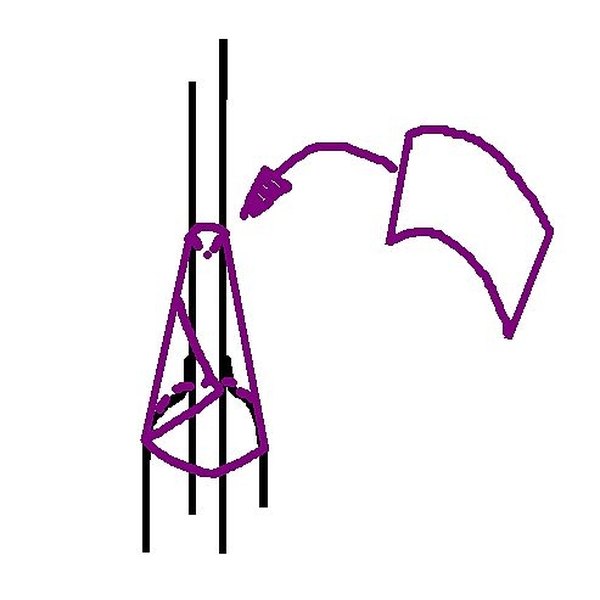
Wrap it around the point where the top of the 16-oz. bottle meets the dowel rod. You should end up with the shape of a cone.

Secure the cone in place with tape.
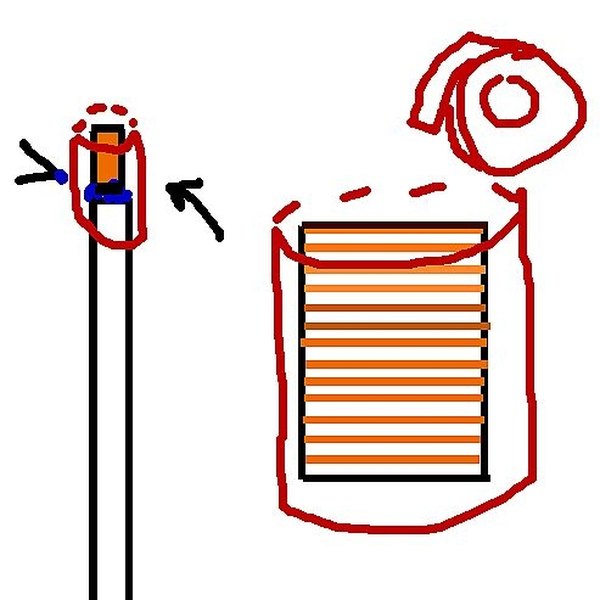
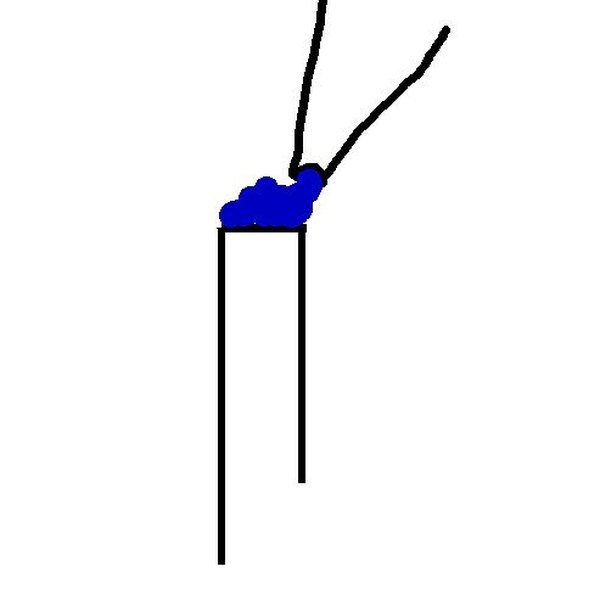
Stack the pennies and wrap a piece of tape around their circumference so they don't move. Secure the pennies to the top of the dowel rod by hot-gluing the bottom of the pennies to the top of the dowel rod. Wrap a piece of tape around the pennies and dowel rod to ensure they don't move.

Take the construction paper. Cut out a small 3x3 inch piece. Wrap this into a cone.
Wrap a piece of tape around the cone.
Cut the bottom of the cone off so the bottom circumference is the same as the circumference of a penny.
Place the cone on top of the pennies.

Secure the cone in place by hot-gluing around the circumference of the bottom of the cone.
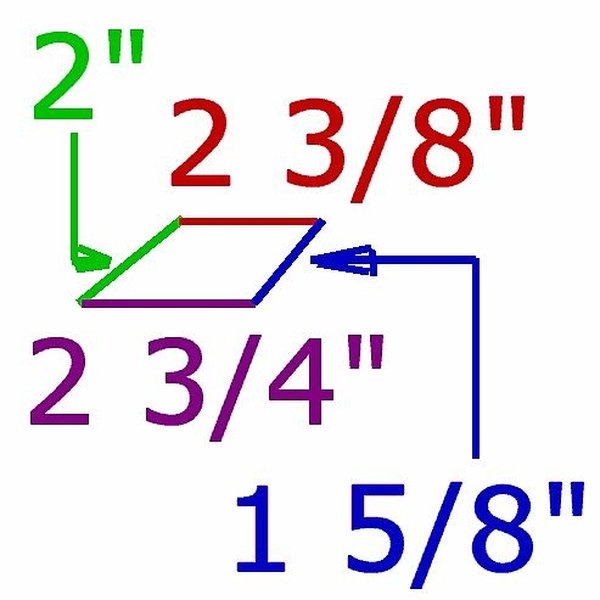
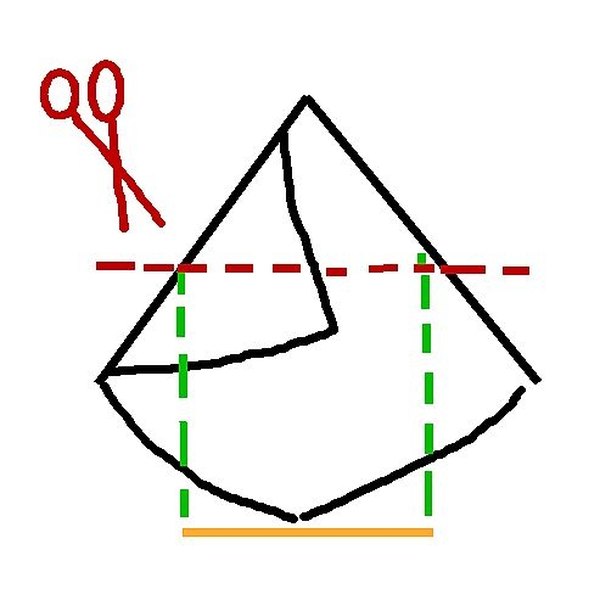
The easy part is done. Now it's time for the hard part--the fins. Take the canvas board and draw one trapezoid measuring 2 3/8" on one of the parallel sides, 2 3/4" on the other parallel side, 2" on one non-parallel side, and 1 5/8" on the last side. The numbers don't have to be exact, but try to keep the general shape.
Cut the trapezoid out. (You may find it easier to put the ruler along the drawn lines and use a razor blade to cut with.)
Trace the trapezoid four times on four different locations of the canvas board and cut them out as well.
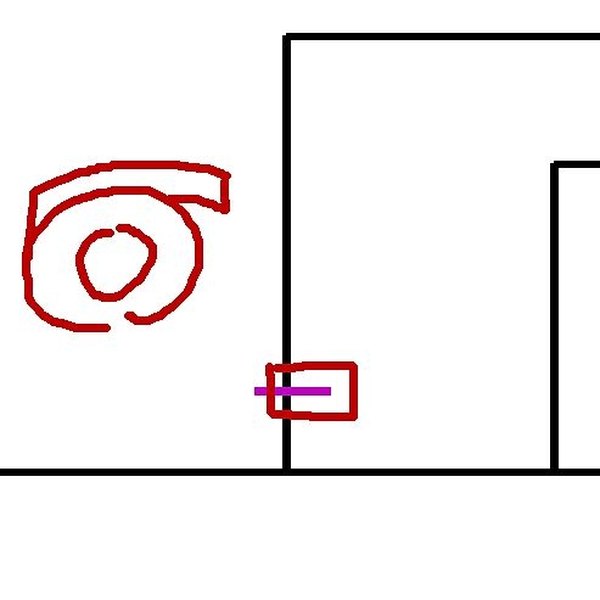
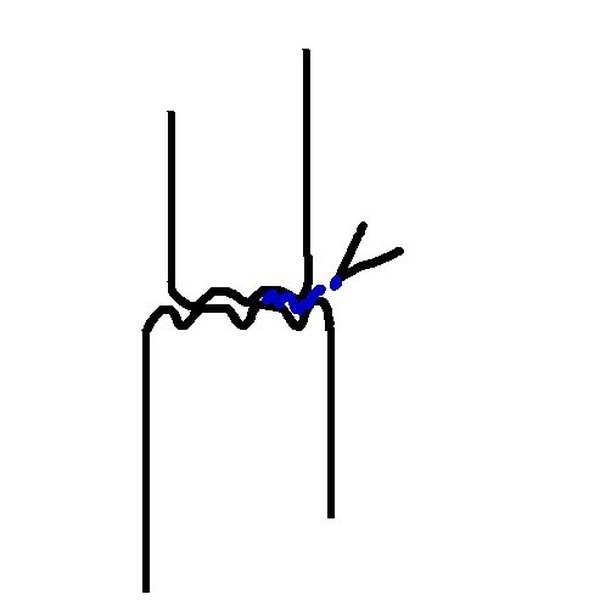
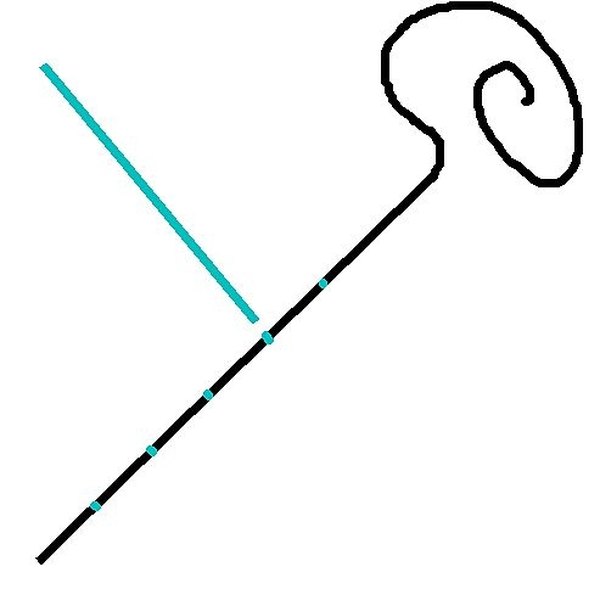
Find a piece of furniture--a desk is perfect. Measure 6 1/8" from the floor and place a piece of tape at that location to mark the spot. Tape the marker at that location. It's very important that the marker is secure. Have another person hold the marker in place (in addition to taping it) if necessary.
Position the rocket so that the cap is touching the ground.
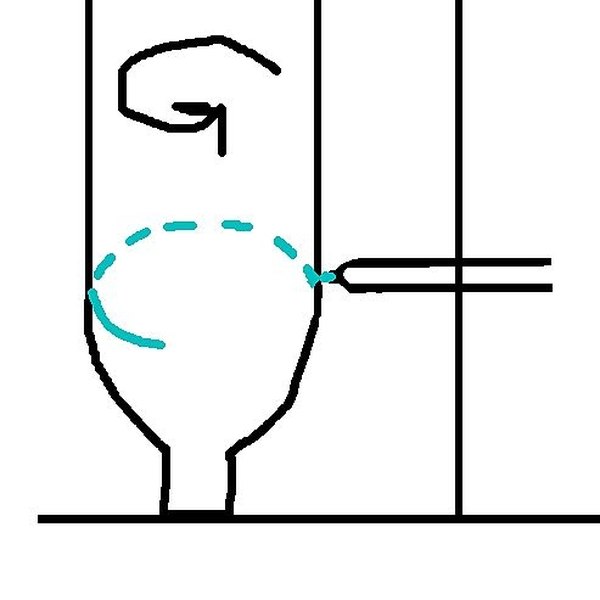
Move the rocket over to the marker so that the rocket just barely touches the tip of the marker. Keeping the rocket level, slowly rotate the rocket 360 degrees until a horizontal line is drawn around the circumference of the rocket.
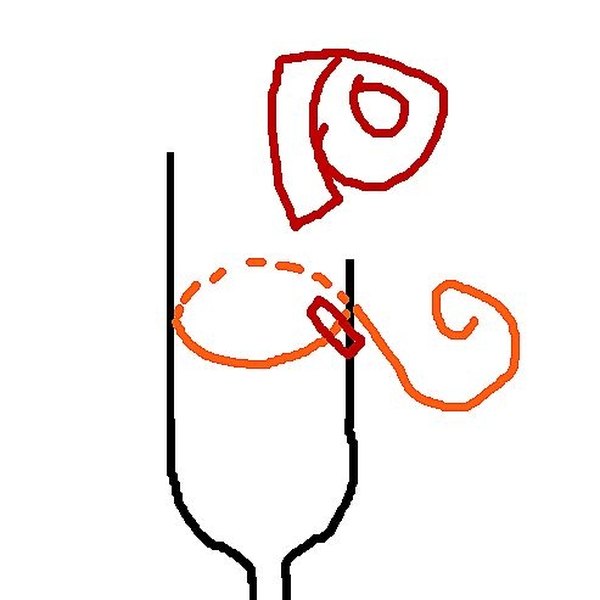
Take the string, and tape the very tip of it to the bottle. Keeping the string horizontal, wrap it all the way around and then some.
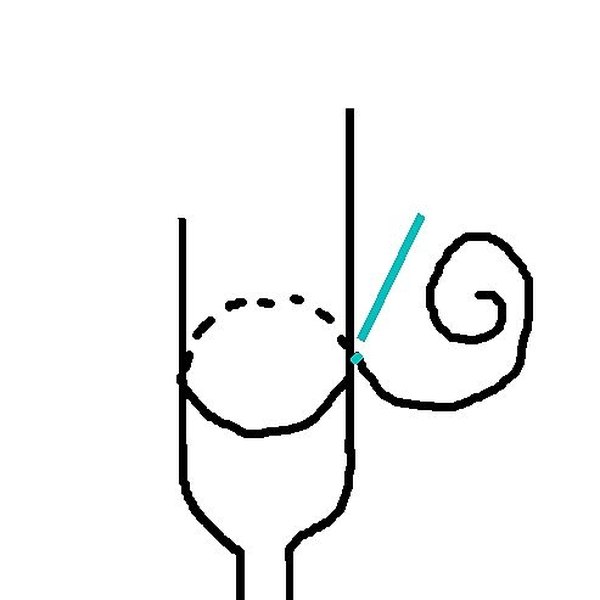
Make a mark on the string where it has wrapped once around the bottle. This gives you the bottle's circumference so that fins can be equally spaced around the rocket.
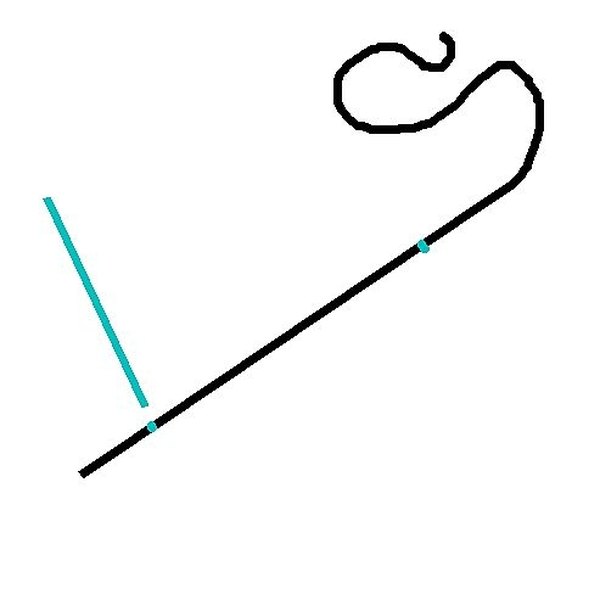
Remove the string from the bottle. Measure the length from the end of the string to mark. Divide this number by five.
Measure from the end of the string to the number you got, and make a mark on the string with the permanent marker. Try to make the mark thin for the most accuracy.
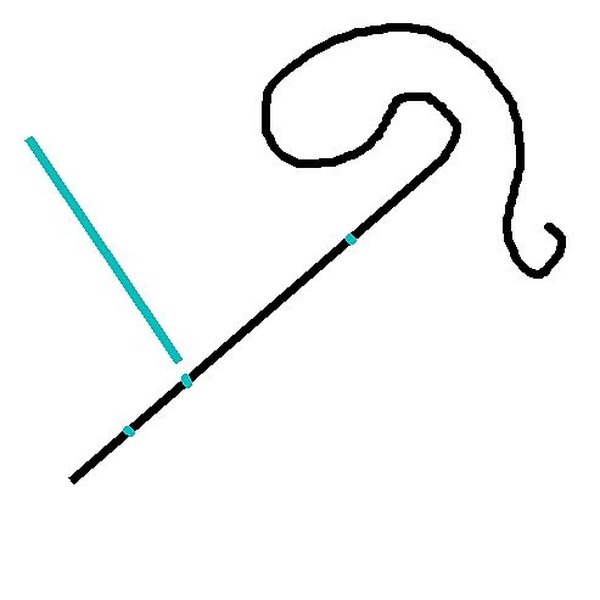
Measure from the end of the string to the number you got multiplied by two, and make a mark on the string.
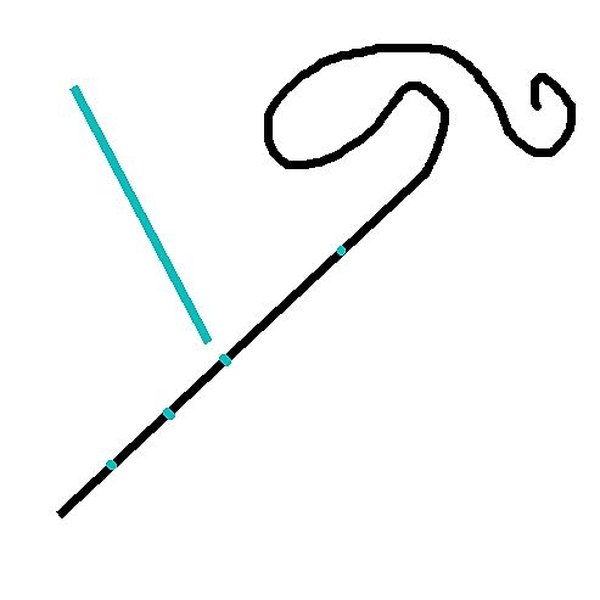
Measure from the end of the string to the number you got multiplied by three, and make a mark on the string.
Measure from the end of the string to the number you got multiplied by four, and make a mark on the string.
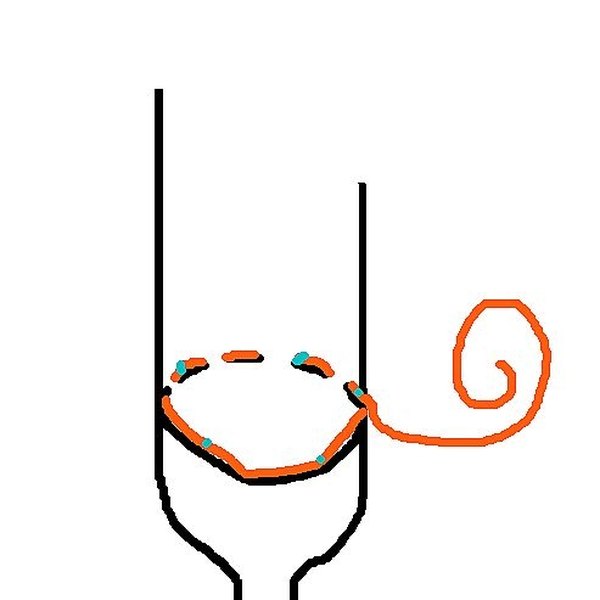
Wrap the string around the horizontal line on the bottle.

Make vertical tic marks on the bottle below each mark you find on the string.
Slide the string straight up to around the middle of the bottle.
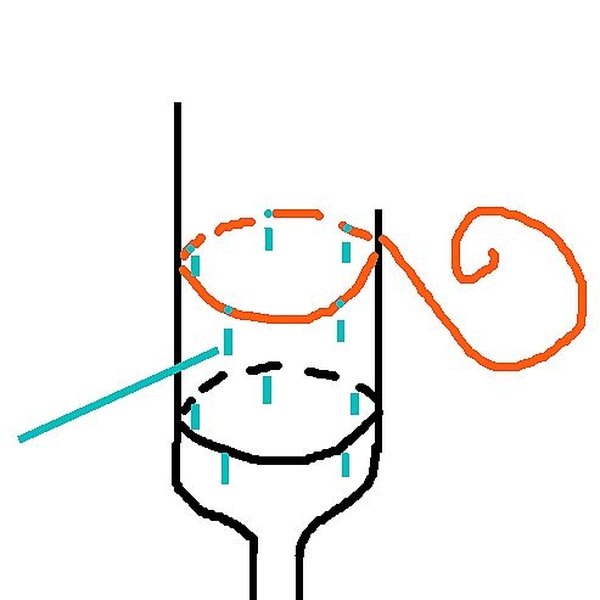
Make vertical tic marks on the bottle below each mark you find on the string.
Use the ruler to connect the marks. Draw a vertical line along the edge of the ruler. Continue to draw the vertical line below the horizontal line to the point where the bottle begins to curve.
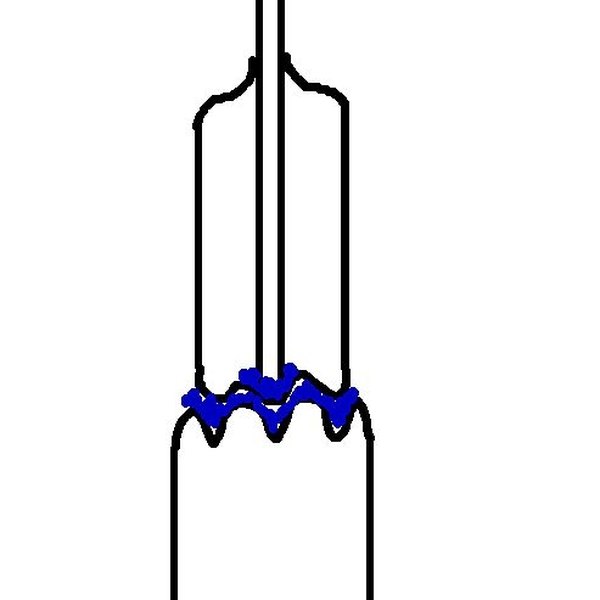
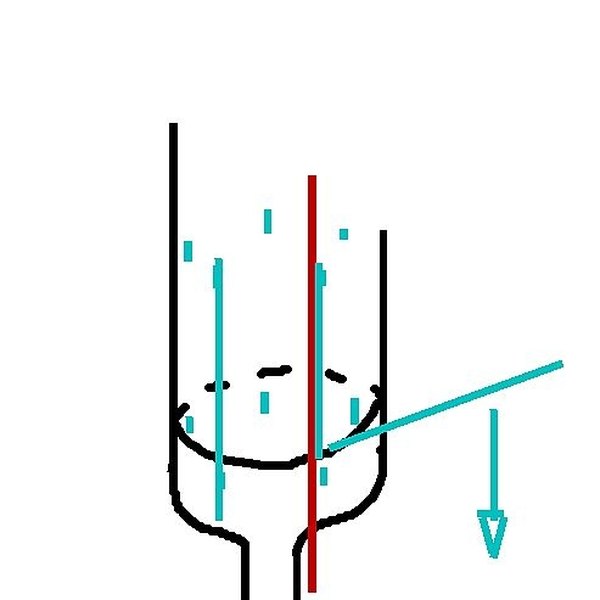
Take one of the fins and place it so that the top of it (where the 2" and 2 3/4" edges meet) is touching the bottom of the horizontal line.
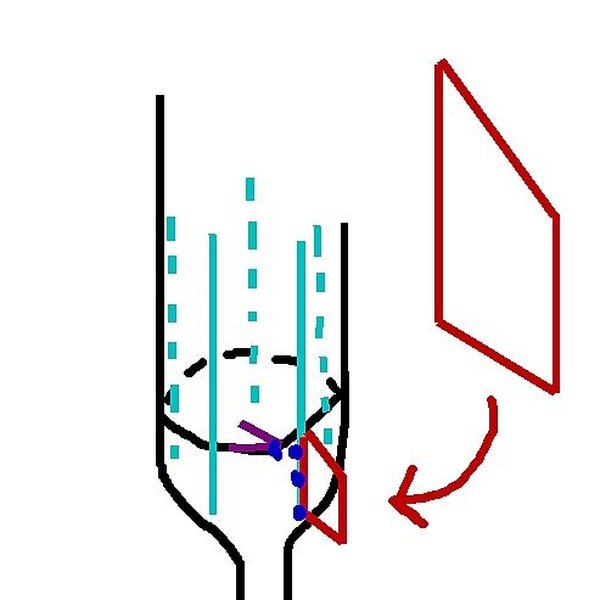
Hot-glue the fin in place by adding tiny dots along a single edge of the fin. Allow these to cool a bit before adding dots along the other side. Work slowly so the bottle doesn't deform as much. Don't worry if part of the fin overhangs the bottle. This just means you need to add more hot glue to the part that touches.
Keeping the fin straight with the vertical line, slowly fill out the spaces between the dots. It's difficult to add too much glue when securing the fins. It's very important that they are rigid during launch and flight. Repeat this process with the next four fins. (To save time, you can start work on the second fin once you no longer have to hold the first fin in place. Once you no longer have to hold the second fin in place, go back to the first one and fill it out.
Remove the cap.
Your rocket is ready for flight! If you want, decorate your rocket just for fun.
Things You'll Need
Tips
Warnings
References
Tips
- Hold the rocket in both hands. Turn you hands so that the rocket is now resting on your index fingers. Very slowly, move your fingers toward each other until they touch. Where your fingers come together is the center of gravity of the rocket. The closer this is to nose of the rocket, the more stable the rocket will likely be.
- Adding weight to the tip of the rocket will generally make it more stable and fly further. Experiment to find the optimal amount.
- Keep weight as far away from the bottom of the rocket as possible. The more weight near the bottom, the more unstable your rocket will be.
- Imagine you shine a bright light on the rocket. Look at the shadow produced on the wall behind the rocket. In general, the more surface area the shadow takes up near the bottom of the rocket, the better. The more surface area that is near the nose of the rocket, the worse. (This is why fins are placed as low as possible on rockets).
- Hemispherical noses produce less drag than conical noses. If possible, use a hemispherical nose.
- For a related bottle rocket article, check the resources below.
- For books related to rockets, check the resources.
Warnings
- Be careful not to get burned on the glue gun. Keep it in the same place while building the rocket so you don't forget where it is and accidentally bump into it.
- Be careful with cutting out the fins. Canvas board is thick. If using a razor, be sure to cut slowly with a steady downward pressure. Keep your hands in a safe location so that if you slip, you won't get cut.
- Don't design the fins so they overhang too much. You might have problems getting the rocket to fit on the launch pad.
- The nose cone will be damaged after launch. Keep a few spares with you for a quick on-site repair job.
- At the launch site, it's good to have a roll of duct tape with you to perform emergency repairs (like a fin falling off, or the pennies breaking off).
About the Author
This article was written by the CareerTrend team, copy edited and fact checked through a multi-point auditing system, in efforts to ensure our readers only receive the best information. To submit your questions or ideas, or to simply learn more about CareerTrend, contact us [here](http://careertrend.com/about-us).