
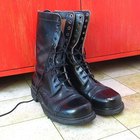
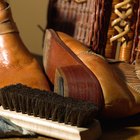
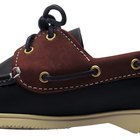
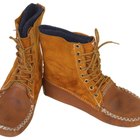
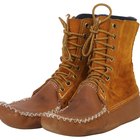
Wingtip shoes are named for the ornamental piece of leather that covers the toe of the shoe, forming a W shape that vaguely resembles a bird spreading its wings. The holes punched in the decorative leather form a pattern in the outer layer of the shoe creating a stylish, classic men's accessory. However, the very detail that makes this shoe stylish can require an extra bit of attention when the time comes to add polish to your wingtips. Shining your shoes helps protect them from the elements and adds years of life to your footwear. Additionally, nothing ruins the look of a well-dressed man like a pair of scruffy shoes. To keep your wingtips, and subsequently yourself, looking sharp, follow the steps in this guide.
Cover the area you will be working in with old newspapers to avoid inadvertently leaving any shoe polish marks on the floor. With a large, stiff brush, buff the shoes to remove any dirt or dust.
Use a toothbrush to remove any dust or dirt from the holes in the wingtips and the edges of the shoe, where the upper is stitched to the sole. Once the dirt, dust and debris are scrubbed away, rub the toothbrush lightly in the shoe polish and apply polish to the clean shoe edge.
Repeat Step 2 on the sole of the shoe. Brush away any dirt and then apply a thin layer of shoe polish to the sole of the shoe.
Coat your bare index finger with a light layer of shoe polish.
Apply the polish to the shoe, moving your finger in a small circular motion, pressing firmly on the shoe leather.
Repeat Step 5, covering the whole shoe with a layer of shoe polish. Polish should be applied in small sections, beginning with the wing tip cap on the toe, moving around to the sides of the shoe, then finally the heel and the sides of the shoe sole.
Brush the wing tip toe cap area lightly with a toothbrush to remove any excess polish from the holes.
Set shoes aside, away from direct sunlight, for 10 minutes to allow the leather to soak up the shoe polish.
Place a small amount of water in the lid of the shoe polish can. Technically, saliva can be used for this portion of the shining process, hence the term "spit-shine," but water works just as well and is more hygienic.
Wrap your index finger in a bit of soft cloth, such as an old T-shirt or cloth baby diaper.
Dip your wrapped finger into the water and apply the damp cloth to the shoe, moving your finger in small, circular motions. The damp cloth applies moisture to the shoe in the same manner in which polish was applied. Repeat until you cannot see the circles of shoe polish anymore.
Cover one section of shoe at a time, beginning with the wing tip toe cover, moving around the sides of the shoe, then to the heel and finally to the sides of the sole of the shoe.
Apply a second layer of shoe polish, only this time use the damp cloth rather than your bare index finger.
Apply a second layer of water with a clean piece of damp cloth.
Apply a final layer of shoe polish, rubbing your shoes until they reach a glossy shine. If your shoes aren't shiny enough to suit you, keep layering shoe polish and water until they are.
Related Articles
The Best Way to Shine Military Boots
How to Clean Diesel Shoes
How to Clean Suede Shoes With Water
How to Make Simple Indian Moccasins

How to Clean Hugo Boss Shoes
How to Shine Brown Shoes

How to Cook Grey Sole Easily

How To Shine Boots With a Hair Dryer
How to Care for Copa Mundial
How to Get Stretch Marks Out of Leather ...
How to Shine Jump Boots
Uses for Shoe Polish
How to Remove Ink From Shoes
How to Make Mens Moccasin Boots
How to Buff Boots
How to Shine Brand New Corcoran Jump ...
Getting Dirt Stains Out of Gray Leather ...
How to Shrink a Suede Shoe
How to Deodorize Crocs

How to Get Creases Out of a Toe Box
Writer Bio
Lisa Parris is a writer and former features editor of "The Caldwell County News." Her work has also appeared in the "Journal of Comparative Parasitology," "The Monterey County Herald" and "The Richmond Daily News." In 2012, Parris was honored with awards from the Missouri Press Association for best feature story, best feature series and best humor series.
Photo Credits
wikimedia commons