
How to Paint a Goalie Helmet
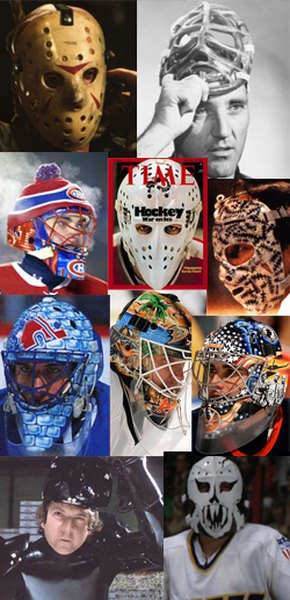
One of the more artistic things you can do in sports is to paint a goalie helmet. Many professional, amateur and recreational hockey players do it. All you need to do is choose a design that matches your team's colors, mascot or personality.
Select the type of helmet you want to paint. Most helmets that are practical to paint are made of either ABS plastic or fiberglass. Helmets made of other material are probably not safe to use in play, much less paint on. If this is your first attempt at painting a mask, you may want to have a backup ready in case you mess up.
Remove all straps, hardware and add-ons. Before you go any further, you may want to sketch your design ideas on paper. Painting from memory or as you go can make for a poor outcome.
Tape the inside of the helmet to protect the lining. Some helmets have removable lining, so take that out before taping. Never skip taping a helmet, as the material on the inside often differs from the plastic or fiberglass on the outside.
Sand the helmet with 400-grit sandpaper. Never use an electric sander or coarse sandpaper. The point of sanding is to remove the shine or gloss on the helmet in order to paint it. Be careful not to sand it down too much--you don't want to create an uneven surface by wearing down the layers. Also, be careful not to sand any metal buckles or snaps. After sanding, clean the helmet with rubbing alcohol and a soft cloth.
Select your paint. The best paint to use is a water-based acrylic because it won't affect the composition of your helmet. One such paint is Createx Auto Air. Oil-based paint damage your helmet. Since you are using an airbrush, you may want to use a respirator to avoid getting paint in your lungs. Auto Air is non-toxic, and it can be used with bonding agents and catalysts. You will want to mix these into your paint to get it to better adhere. It also helps to put your helmet on a stand to paint it.
Put a base coat on the helmet. Most base coats are black or white. White base coat allows for a bit more leeway on colors. Paint the background color next. Blow dry the paint. Tape over the helmet to prepare for the stencils that will be your picture, emblem or logo. Use strong masking tape, and make sure you tape the entire area you want to detail.
Cut your designs into the tape and helmet with the Exacto knife. You'll need many blades to keep the cuts sharp. For multiple colors, you have to retape and cut again for each additional color. Be aware of the location of the helmet holes when you are stenciling so you don't poke through them and cut your hands. Remove all the tape when you're done stenciling.
Finish your helmet with a clear coat, like Rustoleum Clear Lacquer. About three or four thin layers should protect the helmet. Make sure you let each layer dry before adding another. Reattach all the pieces when you're done.
Warnings
Some hockey leagues require the goalie to wear only pre-approved helmets. Check your league rulebook or regulations to make sure you are painting an approved helmet
Warnings
- Some hockey leagues require the goalie to wear only pre-approved helmets. Check your league rulebook or regulations to make sure you are painting an approved helmet
Writer Bio
Jason Tyson has spent the last 13 years working as a writer and editor in various forms of the publishing world, holding positions at major newspapers, magazines and journals. Tyson worked for six years at two different North Carolina newspapers, the Winston-Salem Journal and Wilmington Star-News. He also spent three years in New York City, with Martha Stewart Living Magazine and Law Journal Press.