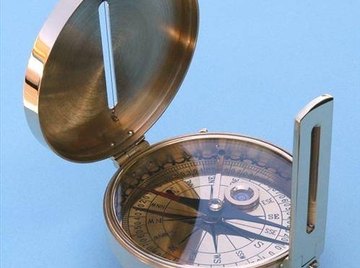

The compass is used for navigation, location and direction. People use it to find their way, whether it is on a hiking trail or on a trip to a new location. It is an instrument composed of a suspended magnetic pointer that is attracted to the polarity of the North Pole. A precisely measured scale is used to mark the directions, relative to the north. Through a slight left or right turn, a compass will accurately point to the North Pole and identify the angles of the other cardinal directions.
Identification
The magnetic needle floats upon an axis, inside a compass apparatus, to easily align with the earth's magnetic pulls.
History
The compass was invented in the second century in China. It was first used to align structural and building elements with the environment.
Time Frame
It wouldn't be until the 11th century that the compass was used for navigation. The first navigational compass produced by China consisted of a bowl of water with a floating magnetic needle.
Significance
In 1282, Al-Ashraf of Persia was the first to be recorded as using a compass for study of astronomy. The astronomical compass would be further developed using the earth's magnetic pull and a time-keeping mechanism to calculate the direction of Mecca for the obligatory Islamic prayers. It also acted as a timekeeper that indicated the time of the five daily prayers.
Function
Besides navigation, the compass is used in building and construction for marking landmarks and borders, and to measure horizontal lines and vertical lines for maps. The compass is a valuable tool used in the U.S. military, as well as in mining to assist in underground navigation.
About the Author
Naima Manal's articles on health, diet, nutrition, alternative medicine, education, parenting, crafts, travel, home and garden and home improvement have appeared on various websites. Manal received her Bachelor of Science in biology/pre-medical studies from Molloy College in 1994 and has been a freelance writer, teacher and homeschooling mom since 1993.
Photo Credits
Stanley London