
How to Fix a Broken Kohler Faucet Handle

Kohler is a manufacturer of single- and double-handled faucets. Both the single and double-handled varieties are durable, but over time, the internal components of the faucet will wear down, causing the handle to rock and possibly leak water. Not all handle problems require that you buy a new faucet; you can solve many issues with little time or money invested. Before calling a plumber, try to troubleshoot the problem yourself.
Single-Handled Faucet
-
Tighten the Allen screw located on the underside of the handle to prevent rocking. If tightening the screw doesn't work, you will need to replace internal components.
-
Turn the water supply valves to the "Off" position to shut off the water supply to the faucet.
-
Remove the Allen screw from the underside of the handle using an Allen wrench, and pull the handle up and off.
-
Grab the bonnet of the faucet with a pair of slip joint pliers. Pull out the u-shaped retainer clip from the cartridge using a pair of needle-nose pliers.
-
Place a cartridge removal tool, included in a cartridge replacement kit, over the cartridge. Wiggle it back and forth using a wrench and pull the cartridge out.
-
Align the new cartridge in the hole and push down. Reinsert the u-shaped clip and the bonnet. Push the handle back on and tighten down the Allen screw.
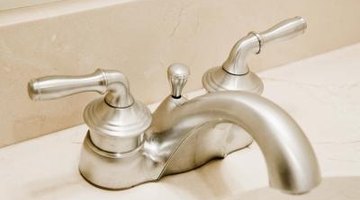
Double-Handled Faucet
-
Remove the cover from the faucet handle and tighten down the screws if loose.
-
Turn off the water to the sink.
-
Remove the screw holding down the loose handle. Pull up on the handle to lift it off the faucet.
-
Remove the packing nut from the top of the faucet stem using a wrench.
-
Pull up the entire stem with a pair of pliers. Remove the brass screw from the bottom of the stem and replace the washer if the handle was leaking. If not, replace the entire stem.
References
Photo Credits
- Jupiterimages/Creatas/Getty Images
More Articles