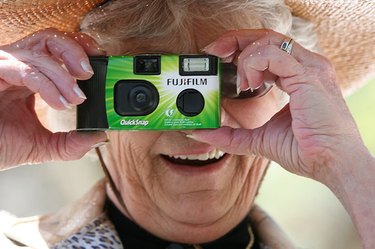
Developing color film is something you can do yourself, provided you have the right equipment and thoroughly understand the development process. If you have a dark room, developing film from a disposable camera isn't much different than the film in other cameras. The main difference is getting the film out of the camera without exposing the film in the process.
Removing the Film
Video of the Day
Step 1
Remove the outside cardboard and paper casing from your disposable camera with a pair of sharp scissors.
Video of the Day
Step 2
Unscrew the screws or unclasp the clasps that are holding your camera together. If you have difficulty popping the camera open, use a paper clip to pry open the camera body.
Step 3
Put the camera inside a developing bag, or set up your tools in your dark room. From this point forward, the camera and the film it contains cannot be exposed to any light.
Step 4
Open the camera and clip the film from the inside spool. Insert the straight edge into your film reel and wind the film onto the reel.
Step 5
Place the loaded reel of film inside your developing tank. Put the lid on the tank and turn on the lights.
Processing the Film
Step 1
Read all of the instructions on the chemical containers before you begin developing your film. Use exact measurements and understand the time requirements for your film type.
Step 2
Pre-wash your film by filling the developing tank with water and allowing it to soak for about two minutes. Pour out the water.
Step 3
Add the developer solution and tap the developing tank to break up bubbles. Agitate for the recommended length of time. Timing with this step is critical.
Step 4
Pour developer solution back into its container to be used again at a later date. Perform the stop bath by filling the tank with stop solution. Shake the solution in the developing tank and then empty. Repeat the stop bath process a second time.
Step 5
Pour the fixer solution into the tank and agitate briskly every 10 seconds for five to 10 minutes. Pour contents back into the storage container and rinse the film.
Step 6
Unscrew the lid to begin the washing process. Your film now can be safely exposed to light. Fill the tank with water and swish vigorously for about 20 seconds, then empty it into the sink. Repeat this process for 10 minutes.
Step 7
Add a half-inch of wetting agent to your developing tank and fill it slowly with water until your reel of film is completely submerged in the mixture. Tap the tank to burst unwanted bubbles, and allow the film to soak for about 30 seconds.
Step 8
Empty the developing tank, and take out the reel of film. Begin unraveling the reel and hang the film to dry in a dust- and dirt-free environment for at least four hours.
Step 9
Cut dry film with your scissors into manageable negatives, and store them in a paper or plastic sleeve.