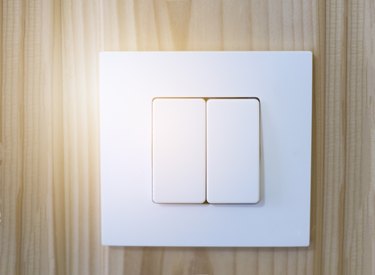
Wall switches that come with lighted toggle swich wiring can be a real convenience at night when you can't see. Similarly, a switch with a pilot that monitors the circuit to the fixture or outlet controlled by the switch is not only convenient, it may also prevent an accident caused by a failure in the circuit. Although these two types of switches require different wiring, the procedure is almost identical to wiring a conventional switch.
Illuminated and Pilot Switches
Video of the Day
An illuminated wall switch has an internal circuit that provides just enough electricity to power an LED in the rocker, and this circuit becomes active only when the switch is off. Consequently, the switch terminals are identical to those of a regular switch -- two brass ones for the hot connections and a green ground screw. A pilot switch has the same terminals, but it has one more -- a silver screw for connection to the circuit's neutral leg. The procedure for connecting this terminal involves installing a jumper wire or "pigtail" between the switch and the spliced neutral wires.
Video of the Day
Wiring an Illuminated Light Switch
To wire an illuminated light switch -- and this is true for any conventional single-pole, single-throw switch -- you need only the hot wire that comes from the power source and the one that goes to the fixture that the switch controls. After turning off the circuit breaker and stripping an inch of insulation from the ends of all the wires in the box, test the box to confirm that power is "off" with a non-contact voltage tester.
Connect one of the black wires to the top brass terminal and the other to the bottom. It doesn't matter to which terminal you connect either wire. The white wires bypass the switch, so twist them together and screw on a wire cap. Finish by twisting both ground wires together, leaving one longer than the other, and connecting the long one to the ground terminal.
Wiring a Pilot Light Switch
In terms of electrical connections, the only difference between a conventional switch and one with a pilot light is the presence of a single silver terminal on the pilot switch. This is for connecting the light -- not the switch -- to the neutral leg of the circuit that powers the fixture. To connect this terminal, cut a 6-inch length of white wire out of a piece of cable and strip the ends -- use wire with the same gauge as the rest of the wires in the box. Twist this jumper wire together with the two neutrals, cap the splice connection with a wire cap and connect the other end of the jumper wire to the silver terminal.
Test the Wires
Switch wiring can get slightly more complicated when the switch comes after the fixture in a circuit or it's located between two fixtures. In some cases, the installer must use the neutral wire in one of the circuits as a hot wire, and although this wire must be identified as hot with a band of black paint or a piece of black tape, people sometimes forget to do this. When wiring a pilot light in such a circuit, it's important to test all the wires with your non-contact voltage tester before you connect them. If one of the wires is mislabeled and you connect a hot wire to the switch's neutral terminal, you'll blow out the light.