
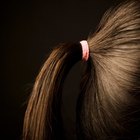
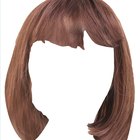
The process of gluing hair weave to a stocking cap is called a quick weave or cap weave. Gluing weave to a stocking cap allows you to create a hair weave style that is similar to a wig. Because the weave is glued to the cap and not to the hair, it can be quickly removed and replaced at any time. Creating a cap weave allows you to experiment with a different style, color, length, and texture of hair without causing any damage to your natural hair.
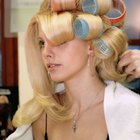
Wash, condition and blow dry the natural hair to make sure it's free of any dirt and oils. Apply a moisturizer to the natural hair and comb it thoroughly.
Braid the natural hair into a beehive design. Beginning at the nape of the neck, start cornrowing the hair in a circular motion until you reach the crown of the head. Secure the end of the cornrow to the head using a bobby pin.
Put a plastic shower cap or bag over the natural hair. This is done to protect the natural hair from any glue that may soak through the stocking cap. A mannequin's head may also be used if it's similar in size to the person who'll wear the cap weave.
Slide a stocking cap over the plastic cap/bag. Make sure the stocking cap is pulled down to the forehead and fits snugly.
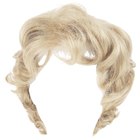
Remove the weave from its packaging and place it against the head. Beginning at the nape of the neck, stretch the weave from ear to ear to determine how much weave you will need. Once you've measured the weave, use scissors to cut the excess.
Apply weave bonding glue to the underside of the weave and place it on the stocking cap atop the head. Press firmly on the weave to be sure the glue adheres to the stocking cap.
Continue measuring, cutting and gluing the weave in a circular motion until you reach the crown of the head.
Cut a piece of weave that is about 2 inches long. Apply a small amount of weave bonding glue to the underside of the weave and roll it tightly (as you would roll a rug) with your fingers.
Allow the rolled weave to dry thoroughly, then separate the hairs down the middle of the roll to create a top closure piece, says the website Black Women Beauty Central.
Apply weave bonding glue to the bottom of the rolled weave closure and place it at the crown of the head. Press firmly on the closure to make sure it's glued securely, then allow the weave to dry thoroughly. The cap weave should be worn without the plastic cap/bag.
Related Articles
How to Put in a Drawstring Ponytail

How to Make a Stocking Cap Bob Weave
How to Curl Kanekalon
How to Do a Stocking Cap Invisible Part ...

How to Re-Curl a Synthetic Wig
How to Style a Human Hair Wig
How to Take Care of Yaki Hair
How to Remove a Stocking Cap Weave ...

How to Use Regular Conditioners on ...
How to Tie Micro Braids at the End
How to Style a Kanekalon Wig

How to Manage Thick, Coarse ...
How to Deep Condition Extensions
How to Use Velcro Rollers So They Don't ...

How to Make a Wig on a Sewing Machine
How to Use Wig Tape
How to Blend a Lace Front Wig
How to Use a Volumizing Finger Diffuser
How to Keep Synthetic Hair Tangle Free

How to Make an Invisible Ponytail With ...
Writer Bio
Sarai Jeremiah is a freelance writer and graphic designer living on the East Coast, where she is currently pursuing an education in both fields. She has been writing articles and content on a variety of topics since 2006 and has contributed articles to Web sites such as Spark People.
Photo Credits
dummy image by Vladimirs Koskins from Fotolia.com