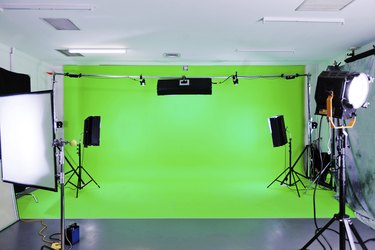
When your favorite movie character flies above the Earth or jumps off a building, movie magic turns a shot captured on a studio sound stage into a believable composite, replacing a solid green background with another scene. In movies and still photos, this process takes advantage of the color contrast between a subject and a fabric backdrop or painted wall. An effects artist isolates the foreground and creates the final scene. With careful use of Adobe Photoshop's tools and features, you can perform similar digital magic on your own images.
Step 1
Open the "Layer" menu, and then choose "Duplicate Layer" to create a copy of your master image. This protects your original photo from any destructive steps involved in the process of extracting the subject from its green-screen background.
Video of the Day
Step 2
Open the "Select" menu, and then choose "Color Range." When the Color Range dialog box opens, set the "Select" drop-down menu to "Sampled Colors." This setting enables you to use the Color Range cursor like a fine-tuned version of the Magic Wand tool and select the background tone.
Step 3
Activate the "Selection" radio button below the image preview area so the preview shows your selection results. Set the "Selection Preview" drop-down menu to your choice of preview option: Grayscale presents fully selected areas in white and partial selections in gray; Black Matte and White Matte use the colors in their names to designate selected areas; and Quick Mask presents the same preview you see in Quick Mask mode.
Step 4
Click on the background green tone to begin your selection. You can make your selection in the main image window behind the Color Range dialog box or on the preview image within the dialog box itself.
Step 5
Adjust the Color Range "Fuzziness" slider to increase or decrease the range of colors that Photoshop considers to be part of the selected area. Raise or lower this setting in much the same way you use the Tolerance setting that increases or decreases the sensitivity of the Magic Wand tool.
Step 6
Click the "+" eyedropper button and sample additional color areas to add them to your selection. If you accidentally add an area you don't want included, press "Ctrl-Z" to undo the last sampling action, or click on the sampled area with the "-" eyedropper. When the background looks fully incorporated into the color range, click the "OK" button to apply it and return to the main image window with an active selection.
Step 7
Press "Shift-Ctrl-I" to invert the selection so it encloses the foreground subject instead of the green background. Open the "Select" menu, and then choose "Refine Edge" or click on the "Refine Edge" button in the Options bar. Lower the Radius setting to accommodate the sharp contrast between your subject and the background.
Step 8
Use the Adjust Edge sliders to smooth and feather the selection perimeter, and the Contrast slider to make the edge appear harder. The Shift Edge slider moves the selection in or out. If you see green fringing around the edges of your object -- typically because the photographer failed to position it at the correct distance from the green screen -- activate the "Decontaminate Colors" check box to shift the color of pixels at the outer edges of the subject.
Step 9
Set the Refine Edge "Output To" drop-down menu to "New Layer With Layer Mask" to create a new version of the image layer with your selection applied as a pixel mask. Make this choice especially if you use the Decontaminate Colors option, which changes the image rather than simply altering the selection. Even if you duplicated your image before you began the extraction process, making this option a regular part of your mask-creation routine helps protect your work from accidental alterations.
Video of the Day
- Adobe Systems: Adobe Photoshop Help and Tutorials [Creative Cloud]
- Adobe Systems: Adobe Photoshop Help and Tutorials [CS 6]
- FilmmakerIQ.com: Hollywood's History of Faking It: The Evolution of Greenscreen Compositing
- SignVideo: How Chroma Keying Works
- The Ken Stone Index: Chroma Key Basics for DV Guerrillas -- Part 1