Power drills are essential in home improvement whether it's for hanging a picture or going through a brick wall. Although there are many drill styles and types, when it comes to changing the drill bit, the only decision to be made is if your drill has a keyless or keyed chuck system. The majority of portable drills use a keyless chuck, while older or larger portable drills and drill presses use a keyed system.
Video of the Day
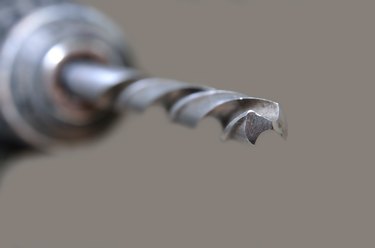
What Is A Chuck?
A chuck is the part of the drill that holds the bit in place. Inside of the chuck are three jaws that open or close, depending on the direction you rotate the sleeve of the chuck. When installing a new bit, the key is to place it in the center of the chuck's jaws. For large bits, centering is simple. However, with small bits, they can get stuck between the chucks, making it impossible to drill a hole because the bit will spin off-center.
Video of the Day
Changing the Drill Bit On A Keyless Chuck
First, remove the existing drill bit from your drill by turning the sleeve clockwise to widen the jaws. As they move apart, the jaws will loosen their grasp on the drill bit and it will fall out.
If you are replacing your drill bit with a smaller one, tighten the sleeve to bring the jaws closer together before inserting your new bit. You can do this by manually rotating the sleeve clockwise or placing your drill in reverse and slowly pressing on the trigger. If your new bit will be larger, then loosen the jaws by rotating the sleeve clockwise or slowly pressing on your drill's trigger while in the forward position.
Before you install the drill bit, make sure the jaws are wide enough to accept your bit. Next, carefully center the bit between the jaws and tighten the collar by turning it counterclockwise until it is locked in place. To speed up the tightening process, carefully place the bit inside of the chuck, place the drill in the forward position and slowly press on the trigger while holding the bit. You will need to hand tighten the sleeve at the end to confirm that the bit is secure.
Once your bit is fully installed, check to make sure it is centered prior to use. With your drill in the air, pull the trigger and check for wobbling. If the bit is not properly centered, you will immediately notice.
Changing the Drill Bit on A Keyed Chuck
A keyed chuck includes three holes in the chuck that are used to loosen and tighten drill bits. The key must be inserted and rotated in each hole in order for the chuck and jaws to move.
When removing or installing a drill bit into a keyed chuck, use the same basic steps as you would for a keyless chuck. However, final tightening is done with the key, not by hand.
When you insert your new bit, make sure it is centered between the jaws, begin the tightening by hand and then use the key, placing it in each hole. As with a keyless chuck, it is important to test your drill before use to ensure the bit is centered between the jaws.