
Decorating Ideas to Update a 1960s House

Architecture, appliances, window treatments, rugs and accessories have evolved since the space-age-inspired 1960s. Then and now, the materials, colors and shapes in a home affect the mood the space conveys. A house built in the 1960s doesn't have to wear that era's decor, though: Regardless of when your abode was built, you can express your tastes or whims and decorate with a contemporary or even cutting-edge look. Explore decorating ideas to update a 1960s home with a makeover that suits you.
Creating a Mood


A harmonious decorating scheme creates a mood, such as tranquility in a bedroom inspired by an island getaway, coziness in a country kitchen or high energy in a home office. Exploring examples of contemporary interior design in magazines and furniture showroom can help you choose looks that you'd like to customize for your decor. Choosing a dominant color for each room simplifies the process of updating your decor. Neutral colors such as cream, tan, taupe, white, black and brown offer a clean, up-to-date look for furniture and area rugs.
Decorating Style

Choosing a decorating style that plays up features of a 1960s home can create an update that fits your home. For example, if the kitchen has built-in cabinets, update the knobs or handles with new hardware to suit your decorating theme, such as wrought iron for a rustic kitchen, ceramic for a country kitchen or matte metal for a contemporary touch. An eclectic decorating style combines furniture and accessories from different eras and cultures, offering a strategy for working with retro materials in a 1960s home and adding updated features such as window treatments in neutral colors, natural-fiber area rugs, framed contemporary art and an up-to-date entertainment center.
Contemporary Materials
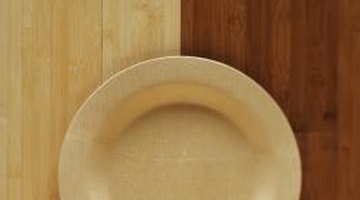
Eco-friendly sustainable materials such as bamboo offer an option for updating a 1960s house. Adding bamboo flooring, room screens, cutting boards and blinds connects your house to the green trend in home decor. Bamboo's durability and range of finishes -- from light to dark tones -- makes it versatile for any room or theme. Rattan and wicker furniture and accessories have timeless appeal and offer curved lines that work well with traditional, transitional and contemporary decorating styles.
Updating Tips
Changing the cushion fabric on rattan or wicker chairs, love seats and sofas gives them a new look -- a money-saving way to update your house. Throws and accent pillows can give a new look to upholstered furniture.
Area rugs, runners, curtains, hand-woven blankets and accessories such as vases, dresser scarves and fountains give a room a new look without the expense of changing all the furniture. Live plants bring nature into your home. Arranging plants in groupings in each room gives your home a fresh look.
Writer Bio
Gryphon Adams began publishing in 1985. He contributed to the "San Francisco Chronicle" and "Dark Voices." Adams writes about a variety of topics, including teaching, floral design, landscaping and home furnishings. Adams is a certified health educator and a massage practitioner. He received his Master of Fine Arts at San Francisco State University.
Photo Credits
- George Marks/Retrofile/Getty Images
- George Marks/Retrofile/Getty Images
- Comstock Images/Comstock/Getty Images
- Thomas Northcut/Photodisc/Getty Images
More Articles