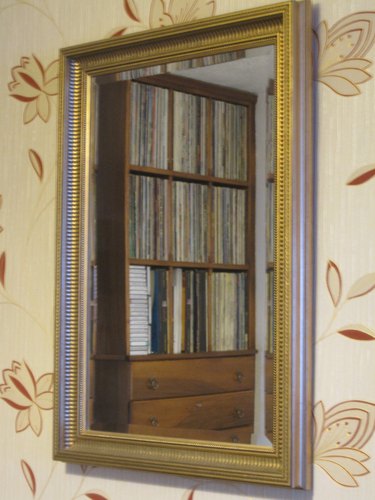
A mirror gets its shininess from one or more coatings applied to the back of the surface glass. Usually, this involves a coating of very thin silver, followed by a copper coat, and finally a black protective coating. When a mirror develops scratches or spots that mar the overall shininess of the surface, the flaws are usually not on the front face of the glass layer, but are more likely due to scratches, chips, or peeling to the layers applied to the back side of the glass. When this coating gets scratched or starts to peel, the mirror will longer have its uniform shiny surface when viewed from the front.
Often, these flaws can be remedied to some degree, although the length you're willing to go will depend on the original cost of the mirror, and on whether or not it has some kind of sentimental value to you. The easy fixes to a mirror are not very expensive, but they're also often less than perfect. And the more sophisticated fixes require materials that may well cost more than the mirror is worth. If a perfect mirrored surface is all that will satisfy you, you're probably best off by seeking a professional or buying a new mirror. But you probably will be able to improve flaws in a mirror to some extent through one of the following methods.
Video of the Day
Video of the Day
Experts warn against amateurs tackling a true "resilvering" of a mirror, since the process requires the use of hazardous chemicals and the results may still be less than perfect. Even the most basic resilvering kits can cost $60 to $150, which may well be more than you paid for the mirror in the first place. If the mirror is genuinely precious to you, the best strategy may be to take it to a professional glass shop for resilvering.
Here are some DIY options you can use to remedy scratches or other flaws in the reflective coating on a mirror.
Try the Aluminum Foil Fix
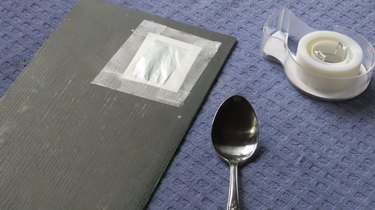
For very inexpensive mirrors, you can try a quick fix with materials you already have around the house: ordinary aluminum foil and Scotch tape. This repair is not likely to make for a perfect reflective surface, but it usually will improve it.
- Lay out a soft cloth on a large flat work surface (or on an open expanse of carpeting).
- Examine the mirror to determine the best way to remove the mirror glass from its frame. In certain types of mirrors, the glass is held within the frame by pliable metal tabs, while in other styles the glass may be secured with screws.
- Disengage the mirror glass from the frame. Take great care not to further damage or break the mirror glass or the frame. Set the mirror glass face down on the work surface.
- Examine the back side of the glass and locate the scratch in the mirror coating.
- Cut a piece of smooth aluminum foil that will entirely cover the length and width of the scratched coating.
- Set the foil in place, reflective side down, over the scratch. Tape the top edge of the foil down with a piece of Scotch tape.
- Burnish the foil with the rounded edge of a spoon or a wooden craft stick. Smooth any wrinkles out of the foil.
- Tape the remaining edges of the foil with tape.Remount the mirror in the frame.
Repair Scratches with Hobby Paint
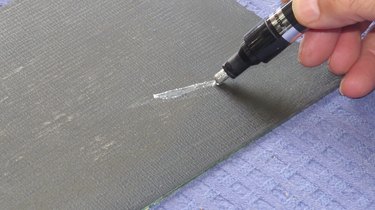
Hobby stores sell a variety of reflective paints, and a moderately good fix for a scratch in a mirror coating can be achieved using a touch-up pen with chrome mirror paint. This fix will usually make a mirror look fine at a casual glance.
- Remove the mirror from the frame and lay it face-down on a soft surface. Locate the scratch in the reflective coating on the back.
- Clean the area around the scratch on the mirror coating thoroughly. The mirror needs to be clean and completely dry for the chrome mirror paint to adhere.
- Shake the touch-up pen very thoroughly. This is key to getting the paint to adhere correctly.
- Depress the tip of the pen against the surface until the chrome paint seeps down into the tip.
- Now paint the scratched area, covering the scratch completely.
- Allow the paint to dry thoroughly, then apply another layer of paint and let that dry thoroughly.
- If desired, cover the patch area with a flat black paint to seal the patch area.
Use a Resilvering Kit
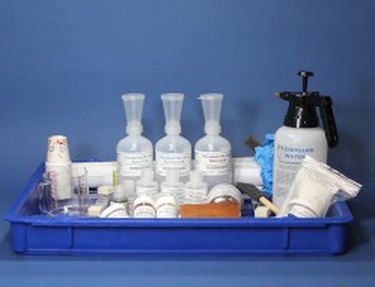
Resilvering kits for mirrors are available from online retailers, but experts we talked to warned that using them is tricky. The chemicals are toxic and must be handled carefully. The kits are expensive—often more expensive than the mirror iteself—and the results may not be what you hope for. If you do attempt it, this is what the process looks like:
- Carefully remove the mirror glass from the frame.
- Inspect the coated side of the glass for damage. If it is the glass itself that is damaged, not just the coating, resilvering will not correct the damage and may even highlight it. If the mirror glass itself is damaged, consider replacement.
- Strip the backing paint from the mirror using paint stripper. Some resilvering kits come with the paint stripper included, or you may need to buy paint stripper separately. Make sure that your paint stripper is suitable for removing paint from glass, and follow the label instructions exactly.
- Use nitric acid to strip the silver coating from the backside of the mirror. Nitric acid should be included in your mirror resilvering kit. Follow the manufacturer's instructions regarding the proper use of this product.
- Clean the stripped glass thoroughly with deionized water and a clean, lint-free cloth. Make sure that the glass is dry and completely free of any surface contamination.
- Mix the chemicals that comprise the silver coating in the sprayer and use a specialized sprayer to apply the coating to the backside of the mirror glass. Let the silver coating dry according to the manufacturer's instructions.
- Apply copper paint over the silver coating. Follow the instructions included in your resilvering kit regarding the proper application method for the copper paint. Let the copper paint dry completely.
- Coat the backside of the mirror with a protective backing paint. Once this final coating is dry, the mirror is ready to reframe and hang.