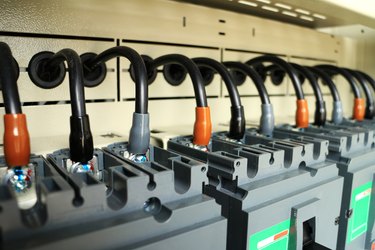
Most of the circuit breakers in a typical residential panel control 110-volt circuits, but every panel usually also has at least one 220-volt breaker. This type of breaker consists of two stacked 110-volt breakers and because of this, it's often known as a double-pole or two-gang breaker. Installing one isn't much more difficult than installing a 110-volt breaker. But because of the potential for serious shocks, a typical homeowner shouldn't try to do this or, for that matter, do any other type of work in the panel. Working in the panel is a job for a licensed professional.
Why Two Poles?
Video of the Day
You wire a light or outlet circuit by connecting the hot circuit wire, which is black, to a breaker and snapping the breaker into an available slot on the panel. Then, you connect the white return wire to the neutral bus and the bare wire to the ground bus. The voltage in this circuit will be 110 volts because that's the voltage between each hot bus and the neutral bus.
Video of the Day
If your circuit requires 220 volts, you have to contact both bars. That's where a two-pole breaker comes in. It's constructed in such a way that each of the two breakers that comprise it clips onto one of the bus bars. When you connect a hot wire to each of these two connected breakers, the voltage between them is the same as the voltage between the bus bars – 220 volts.
What You Need
Because of the higher voltage, 220-volt circuits conduct more current, so to prevent overheating, you need wires with a larger diameter than you do for 110-volt circuits. The minimum wire size is 10-gauge, but appliances that draw 50 amps, such as stoves, require 8- or 6-gauge wires. You also need an extra hot wire, so the cable includes two, which are usually colored red and black. A 220-volt cable includes neutral and ground wires, and are usually designated three-conductor cables because the ground wire doesn't count as a conductor.
Before you buy a breaker, check the brand on the panel and make sure the breaker you buy is the same brand. Although the principles of 220-volt wiring don't change from brand to brand, the panel and breaker designs do, and breakers are not interchangeable among manufacturers. The two most common brands are GE and Square D. Older homes may have panels with other brands, such as Zinsco-Sylvania or Federal Pacific. Although these are now outdated and possibly dangerous, you still need to use the breakers that fit them until you replace the panel.
The Installation Procedure
Before installing a 220-volt circuit, check the panel to make sure you have two slots next to each other to accommodate the breaker. The black hot wire connects to one of the breakers in the two-breaker set and the red wire connects to the other one. The white wire goes on an available lug on the chrome neutral bus and the ground wire goes on the ground bus. It's easy to identify these bus bars because they already have a number of white or bare wires connected to them. Once you've made all the connections, you'll install the breaker by inserting one end into the slot and pushing down on the other end until the breaker snaps into place.
When this procedure is properly performed, no tools or fingers ever need to come in contact with either of the hot buses. However, it's possible to make a mistake. When you do, a shock is the likely result because the hot buses are always energized. This is the main reason you should always hire a licensed pro to work inside the panel.