
Shower Pan Vs. Tile

Shower pans and tile are important flooring materials for shower installations. Pans fit into the corner of the shower stall and have approximately 4-inch-high sidewalls that have a lip to guide water onto the floor and into the drain. A pan is a must for proper water drainage. Tile can be applied on top of the pan, or the pan can be left bare to serve as the shower's flooring. Many homeowners opt to cover the pan with tile to give the shower a finished look.
Shower Pans
Shower pans are used to line the floor of a shower. Pans used in homes today are made of waterproof materials, such as fiberglass or acrylic for exposed pans, or polyvinyl chloride (PVC) or chlorinated polyethylene (CPE) for pans that will be covered with tile. All three types are impervious to water, which makes them particularly beneficial for using in showers. Prior to the advent of PVC and CPE pans, homes had lead shower pans. Builders typically use CPE if they are constructing a custom pan on-site, because CPE is more pliable than PVC. For noncustom jobs, prefabricated pans are used. Some pans have precut drain holes, or you can cut out a hole for the drain if a custom position is required. A poly-sealant is applied to the pan to prevent water from seeping in between the walls and floors.
Tile
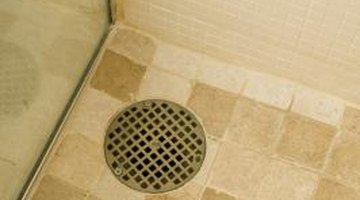
Tile has water-resistant qualities that make it well-suited for use in showers, and it also gives a shower a well-finished look. Tiles used on shower floors must be laid so they have a slight grade, or slope, in order for water to drain properly. Ceramic tiles are the most popular choice; however, you can tile a shower with other materials, including porcelain, granite and even marble. Tiles can also be used as a decorative border around a prefabricated shower enclosure. The standard size for shower tiles is the 4-1/4-inch-square tile, but the choice is yours — you can use larger 12-inch squares or small 1-inch square tiles. What matters most is that the tile you select resists water buildup.
Shower Pan and Tile Combination
Some builders and homeowners opt to use both a shower pan and tile. This combination provides aesthetic benefits. First, if the pan is tiled, you don’t see it, and the shower will have a more finished look. If you are after a total wall-to-floor look in the bathroom and shower area, combining a pan and tile is the way to go. The pan will provide the protection from water that is so necessary, and overlaying the pan with tile will achieve the seamless look that you are after by hiding the pan with a layer of tile. However, you can only cover a PVC or CPE pan with tile; fiberglass and acrylic shower pans are meant to be left as-is.
Considerations
When you consider the small amount of flooring space that a shower stall takes up, it is really not a big budget-breaker to go with a shower pan and tile combination. For example, a 4-foot-square shower stall will only require 144 standard 4-1/4-inch tiles. However, for a shower that will be used by seniors or children, a shower pan alone might be a better choice. Eliminating the tile will make the shower floor less slippery, thus reducing the potential risk of someone slipping or falling while in the shower.
References
Writer Bio
Cheryl Munson has been writing since 1990, with experience as a writer and creative director in the advertising industry. She holds a Bachelor of Arts in journalism with a focus on advertising from the University of Wisconsin in Madison.
Photo Credits
- Jupiterimages/Photos.com/Getty Images
More Articles