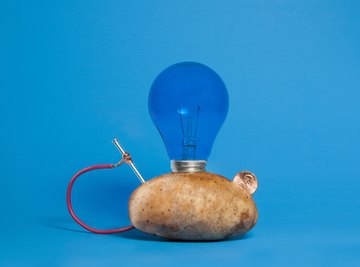
During a power outage, or when you need to brighten a dark area of your home, you can use a potato and light bulb with a few other elements to create light. When you put copper and zinc electrodes in a potato, phosphoric acid in the potato reacts with the electrodes to generate electricity needed to light the bulb. While a potato-powered light bulb won't generate much light for a long period of time, it's enough to gently brighten a dark area while waiting for the lights to come back on.
How to Wire the Potato
1. Halve the potato with the knife to expose the interior. Use the knife to cut a penny-sized slit in the middle of the potato half.
2. Wind a piece of copper wire around each penny. Press the wire-wrapped pennies into the slits created in each of the potato halves. Leave some of the wire hanging out of the potato.
3. Slide one nail into the end of each potato half. Wind copper wire around each nail.
4. Attach the loose copper wire from a penny to the copper wire on the nail attached to the opposite potato. Do not connect the nail and penny wires in the same potato.
5. Connect the two loose wires from the remaining penny and nail, to the light bulb. When the wires touch the bulb, it lights up.
Things You'll Need
- Knife
- Potato
- Two pennies
- Two zinc-galvanized nails
- Copper wire
- Small light bulb
Tips
If the nail and a penny touch, the experiment will not work.
Peeling the potato or soaking it in Gatorade sometimes helps conduct the electricity.
Warnings
Use caution with the wires once it becomes an electric conduit.
References
Tips
- If the nail and a penny touch, the experiment will not work.
- Peeling the potato or soaking it in Gatorade sometimes helps conduct the electricity.
Warnings
- Use caution with the wires once it becomes an electric conduit.
About the Author
Rebecca Gilbert began writing and transcribing in 2003. In 2007, she started a resume-writing company. She earned an associate degree in sociology from Pima College and a bachelor's degree in communications at University of Wisconsin. Gilbert also does tech support for a major technology company and volunteers locally teaching job-seeking skills.