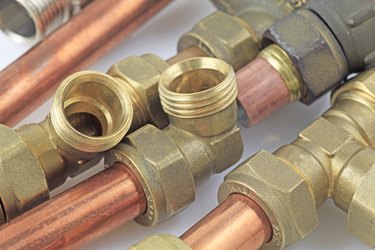
SharkBite fittings work with residential and commercial plumbing systems, offering simple push-to-connect plumbing fittings. The simple fittings make plumbing pipe repairs and modifications more accessible to the average homeowner. As easy as the fittings are to use, it's important to follow the recommended steps to get a good connection that won't leak.
How SharkBite Fittings Work
Video of the Day
Traditional pipe fittings have to be soldered, glued, or connected in other ways, often using special tools and equipment. This can make them difficult to assemble and expensive to use if you have to buy extra tools or supplies. SharkBite uses a push-to-connect design, which means you push the fittings into the pipe to secure them.
Video of the Day
Instead of using solder, glue, or other fasteners, the SharkBite design uses metal teeth along a grab ring to create a strong connection. The release collar keeps it from accidentally releasing while making it possible to remove the fitting when you want. It also has an O-ring to form a watertight seal in the fitting.
SharkBite fittings work on a variety of plumbing materials, including:
- PEX pipes.
- Copper pipes.
- CPVC.
- PE-RT.
- SDR-9 HDPE.
Preparing the Pipe
Your pipe needs to be clean with a square cut to use SharkBite fittings properly. Recut the pipe if necessary to get a smooth, square cut. Check for scratches, dirt, or other debris that could get in the way of a secure connection. When using SharkBite fittings with copper pipes, you also need to deburr the pipe to smooth any sharp edges or burrs that could damage the fitting.
If you're installing several SharkBite fittings, the SharkBite deburring and marking tool makes the job easier. It measures the insertion depth and deburrs your pipe with a simple rotation. You'll also need to mark the insertion depth on the pipe based on the fitting you're using. You can find the depth chart for specific fittings on the packaging or on the SharkBite website. Measure and mark the depth with a permanent marker so it's easy to see and doesn't wipe off while you're working.
Inserting the Fitting
The final step is to insert the pipe into the fitting. Push it until you reach the insertion mark that you already made on the pipe. You don't have to do anything else to connect the two pieces. Turn the water back on to check the fitting to ensure it doesn't leak.
Removing the Fitting
If you need to change the plumbing or switch out the fitting, a universal SharkBite removal tool makes the job easy. This works well if you have multiple SharkBite fittings in different sizes. The grips automatically adjust to fit the size of the pipe and fitting for a secure grip. You can also get SharkBite removal tongs in different sizes that work on specific fittings.
The steps to use the universal tool are simple:
- Position the pipe side prong so it's fully seated on the pipe. Place the fitting side above the barrel of the SharkBite fitting.
- Squeeze the handle to compress the release collar, which is what makes the fitting let go of the pipe.
- Pull the fitting to remove it from the pipe. Rotate the fitting if necessary to help remove it from the pipe.