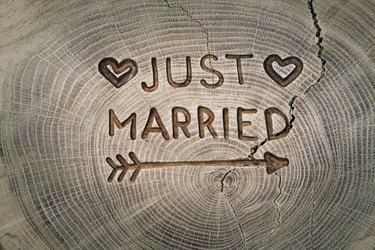
Creating unique items and gifts has become a popular pastime. DIY wood etching can be used for many projects. Designs on wood can be intricate and deep or shallow and wispy. The wide range of styles that wood engraving can create make it a popular choice for décor and personalized keepsakes.
Ways to Etch Wood
Engraving wood is a craft that dates back thousands of years. Originally, pictures and letters were engraved on wood with a sharp hand tool to denote an important event or assist in passing along information to a wide group of people. It became a popular pastime in the mid-19th century.
Video of the Day
Video of the Day
In the 20th century, motorized tools changed the craft and made DIY wood etching an easier and more popular hobby.
Tools for Engraving Letters Onto Wood
Each tool for engraving letters onto wood give a distinctly different look to the piece you will make. They each require different skill sets.
Chip carving – A sharp chisel with two angled lines cut to a point in the middle is used to carve divots into the wood. You have a lot of control over how deep the letters will go, and no two designs will be the same. Gouges will help to shape the hand-carved letters and smooth them out or add detailed points or other sharp edges.
Dremel – These whirring tools can make deep, delicate grooves in nearly any type of wood with ease.
Lasers – These machines have made etching a precise art form for home décor and for sculpture. They can also be used to create small plaques that depict a family crest, personal achievement or just a last name on a cutting board.
Wood burner –
A pen-shaped wood burner gives a distinct shape and color to the engraved letters on planks of wood and is easy to use for first-time engravers. The woodburning pen is built to make your job easy. Let the pen do the work by applying just enough pressure so it doesn't skip over the surface or gouge the soft wood.
Professional Wood Etching
If you want to create a plaque with dates and other fine details, you may want to hire a professional laser company to design and craft your masterpiece. Today's machines can create deep, delicate marks that can create impressive pieces that you or the gift receiver will want to display for generations.
Best Wood for Etching
Soft woods are the easiest with which to work because hardwoods are generally harder to burn. However, the base color that will show through your etching will follow the color of the wood base you use. Dark woods can hide the delicate etching work, while lighter wood types will offer up a dark and deep burn that won't easily split and shows a distinct contrast for design.
The resin or sap content of the wood will determine if it will be light or dark. For darker-burn images, you will want to use woods with high resin content. These include:
- Cherry
- Alder
- Oak
- Ash
- Basswood
- Walnut
- Mahogany
For lighter-burn images, woods with a low resin content can create wisps of images for a more abstract design. Lower-resin woods include:
- White pine
- Fir
- Juniper
- Pine
- Cedar
- Spruce
- Redwood
- Yew
- Larch
Carving Letters in Wood
The sharp edges that a hand tool creates give the engraved letters you make a distinctly different look than other more modern hand-held tools.
Online, you can choose from a wide range of letters to download. The smaller the letter, the more work you will have to do in getting the precise design to transfer well to the wood. Trace the design from the letter-carving templates you made onto the wood.
No matter what tool you use, the proper angle is important to get a concise line. Approach the wood with a consistent angle of 20 to 30 degrees. This will bite into the wood and not skip over the top.