A slate tile patio or outdoor path can be an attractive addition to your backyard. Slate is made from natural stone, and its earthy colors range from shades of gray to black to green or purple. Slate has a nonslip surface, and it's also durable and easy to cut, which makes it an affordable material to use for outdoor flooring.
Laying outdoor slate tile is something you can do without calling in a professional, but you must approach this with some thought. There are some techniques you'll need to learn to make sure your tiles are installed correctly.
Video of the Day
Video of the Day
Getting Ready for Your Project
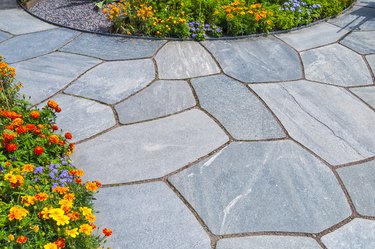
Slate tiles are made from rock that consists of clay and volcanic ash. The tiles vary in thicknesses, so sort them according to similar colors and thicknesses. If you have tiles that will fit together sort of like pieces of a puzzle, you might consider laying them together. Or, lay your slate patio tiles out in a pattern to get an idea of how the floor will look before starting the installation.
Exterior slate tile will look its best if you lay it on a concrete base. Prepare the ground for concrete by clearing the patio or path area using a sod cutter, rake and shovel to remove grass, plants and weeds. Then, mark and level the area using a rake to remove excess soil. Use two-by-fours to make a frame for the concrete that's anchored with 1-inch stakes. Add gravel inside the frame, usually about 2 inches deep, and tamp the gravel until it's packed. Then, pour the concrete. Don't worry about how it looks as it won't show. Just make sure it's level so your patio or walkway will be as well. Then, remove the frame using a hammer. The concrete should harden for at least 12 hours before you begin laying tile.
Mixing the Mortar
Make sure you choose a mortar color that will go well with the tiles. You may want to wear protective eyewear and a dust mask to protect your face and eyes from the dust that the mortar will create. Combine the mortar and water in a five-gallon bucket using a mixer rod and drill. You want to use enough water so the consistency is like cake batter. A three-quarter-inch trowel works best for applying mortar.
Laying the Outdoor Slate Tile
Spread enough mortar for one or two tiles at a time. Then, use a damp sponge to wet each tile before you lay it on the mortar. Be careful if you're spreading enough mortar for more than one tile because you don't want the mortar to dry out. Use spacers between the tiles. Quarter-inch or three-eighths-inch spacers are typical unless you don't want the grout to show. Start from the center of the patio or walkway and work toward the outer edges.
You may need to use a wet saw to cut any tiles that don't fit along the edge. For your walkway, you may not mind if the tiles are a little uneven, but that depends on your taste and how much mortar you want showing. Once applied, allow the mortar to dry completely.
When the mortar is dry, remove the spacers and wet the tiles with a sponge. Mix the grout according to the package directions and then work it into the space between the tiles. When this is completed, use a damp sponge to remove the excess grout. Let your patio or walkway dry overnight, which should be enough time so it can be walked on without tiles shifting.
Caring for Your Slate
You can apply a water barrier sealer to your slate. Some slates are more porous than others, so you should look for a sealer that works well for your particular slate. Check with your supplier to see what kind of sealer you'll need. When cleaning spills, don't use cleaners with acid or abrasive cleaners that can scratch your slate. The best cleaner for slate is a mixture of warm water and mild dish detergent.
Make sure you don't let water pool up on the slate and freeze. Slate typically doesn't absorb moisture, but water can get into slate's pores, and freezing weather can possibly freeze and shatter the stone. If you live in an area with lots of freezes and thaws, you'll want to make sure you have a good sealer. Still, slate is very water-resistant, so it's a good option to put near an outdoor pond or pool.