
How to Apply Orange Peel Texture to Ceilings

Orange peel texture hides imperfections such as screw pops, bulging joints and more in drywall ceilings. A ceiling texture hopper is used to apply the orange peel texture. The end result is a ceiling with slightly raised bumps on the surface, just like an orange's outer peel. Gypsum plaster mixed with a small amount of water is commonly used to create the ceiling texture. The plaster may be purchased at most hardware and paint stores, and is commonly known as drywall mud or joint compound.
-
Take all furniture out of the room and all decor off the walls. Stretch plastic over the entire flooring surface and tape it down with painter's tape. No wrinkles should be in the plastic. Stretch the same plastic over all the walls in the room, as well as doors and windows. Attach it to the ceiling edge with painter's tape.
-
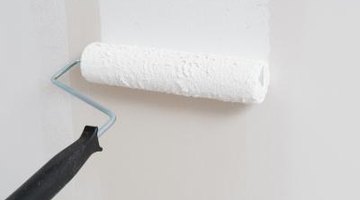
Roll on a coat of latex primer to the ceiling surface. Use a smooth roller with a low nap. Apply one even layer of primer and allow it to dry for 24 hours. Primer helps joint compound adhere to the drywall surface evenly.
-
Place joint compound into your drywall hopper. Add a small amount of water to ensure the plaster can move through the spray gun's nozzle smoothly. Aim the hopper's gun at the ceiling and lightly spray the surface, sweeping the gun in one direction. Allow the surface to dry for about two hours.
-
Spray a second coat of orange peel texture onto the ceiling, but apply in the opposite direction while you are spraying. For example, if the first texture layer was applied moving horizontally, the second coat should be applied moving vertically. Allow the second coat to dry for 24 hours. Paint with two or more coats of latex paint with a rough nap roller.
References
- "Drywall: Professional Techniques for Great Results"; Myron Ferguson; 2002
- Precision Painting: Texture
- Portland Drywall: Orange Peel Texture
Tips
- Take frequent breaks when working on a ceiling to rest your neck and shoulder muscles. Always spray the entire ceiling in one day. If you start and stop spraying you may notice lines on the ceiling where this occurred.
Warnings
- Practice using the hopper and spray gun if you have never applied orange peel before. Practice working overhead and spraying above you, if possible.
Writer Bio
Julie Hampton has worked as a professional freelance writer since 1999 for various newspapers and websites including "The Florida Sun" and "Pensacola News Journal." She served in the U.S. Army as a combat medic and nurse for over six years and recently worked as the Community Relations Director for a health center. Hampton studied journalism and communications at the University of West Florida.
Photo Credits
- Jupiterimages/Photos.com/Getty Images
More Articles