Plastic storage boxes and containers are a great way to organize your home. Most come in clear plastic so that you can easily see stored items. The containers are versatile, stackable and can be used to store items in the garage, office, attic or closets. Labeling your plastic storage containers can be accomplished in many ways.
Techniques
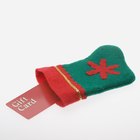
If you are buying a large plastic tub that will be used for the same item, label the box with a permanent marker. Examples are boxes that will hold Christmas ornaments or decor, loose nuts and bolts in the garage or seasonal clothing items you need to store during the offseason for the lack of closet space.
Some plastic containers come with a built-in label slot. Simply slide an index card or other paper in the slot to identify the items within the container.
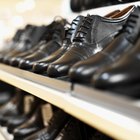
Plastic shoe storage boxes are very popular for the shoe fanatic. These help keep the bottom of your closet area organized and keeps you from having to search for the missing mate to a pair of shoes. You can take a quick photograph of your shoes by using an instant camera with self-developing film and tape the picture to the end of the shoebox for easy identification.
Labeling your plastic containers with sticky labels is a great way to quickly locate an item. You can find removable labels on the grocery aisle with the aluminum foil and plastic wraps or in an office supply store.
Related Articles
How to Donate Trophies to Be Refurbished

How to Locate a Missing Person in ...
How to Deodorize Crocs

Scavenger Hunt Ideas for Couples in ...
How to Store Leather Shoes
How to Identify Authentic Christian ...
How do I Purchase Master Card & Visa ...
How to Repair a Plastic Zippper
Storage Ideas for Artificial Silk ...

Birthday Gift Ideas for a 2 Year Old ...
How to Check for an Original G-Shock

How to Fix Scuffed High Heels
Plastic Recycling Levels
How to Identify an Original Coach

What Types of Foam Can Be Recycled?
How to Take a Sticker off Sunglasses

How to Legally Change Your Name When ...

Favor Ideas for a 75th Birthday Party
Why Can't You Return Unworn Nike Shoes ...

How to Size Wide Shoes
References
Writer Bio
Chelsea Fitzgerald covers topics related to family, health, green living and travel. Before her writing career, she worked in the medical field for 21 years. Fitzgerald studied education at the University of Arkansas and University of Memphis.