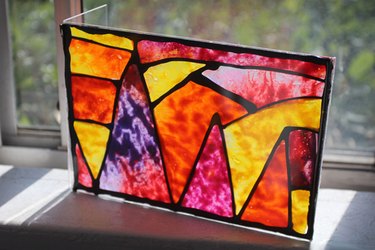
Put all of those broken crayons laying around to good use by making faux stained glass windows, or sun-catchers. Melted crayon panels can be cut up and positioned to create eye-catching designs. With a couple of dollar store picture frames, kids of almost all ages can create beautiful stained glass windows to display in their homes all year-round.
Video of the Day
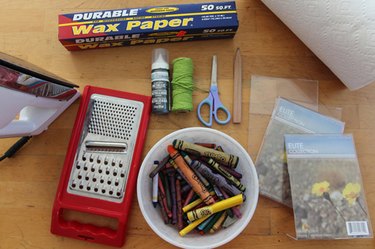
Things You'll Need
Clear acrylic picture frames (2 frames needed per piece)
Bottle of craft paint with a fine tip (black or other dark color)
Wax paper
Crayons, paper labels removed
Cheese grater or vegetable peeler
Iron
Paper towels
Pair of scissors
Any permanent glue that dries clear
Clothespins or small household clamps
Spool of string (optional)
Tip
Clear acrylic photo frames are readily available (and cheap!) at most dollar stores. Pick up a few with either a folded back for wall hanging, or a footed base for free-standing display. Both display styles work great for this project. The frames in this project measured 5-by-7-inches.
Step 1: Sketch the Design
Remove the paper insert that came with the acrylic frame. Using a pencil on the blank, backside of the paper insert, sketch out a design for your melted crayon stained glass project. Whatever you draw will end up being reversed, so keep that in mind if your design incorporates letters or numbers. Also, try to close all of your shapes.
Video of the Day
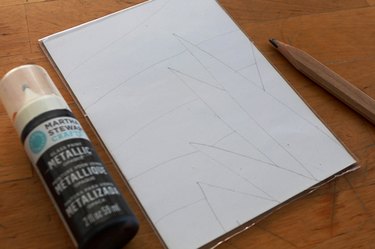
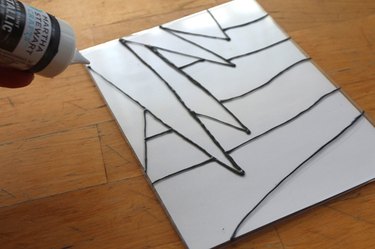
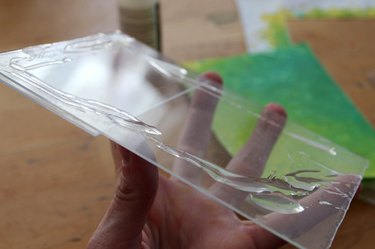
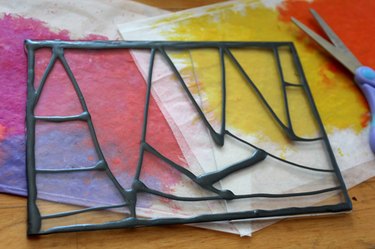
Step 2: Paint the Lines
Use a fine-tip paint bottle to trace the lines you drew on the photo insert, on top of the acrylic photo frame. Allow the paint to dry completely, and then remove the paper insert.
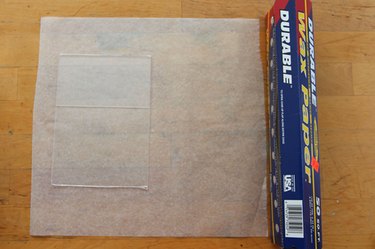
Step 3: Prepare the Wax Paper
Unroll a length of wax paper that is a little wider than twice the width of your acrylic photo frame.
Tip
Freezer paper and parchment paper will not work with this project. Be sure to use good old-fashioned wax paper!
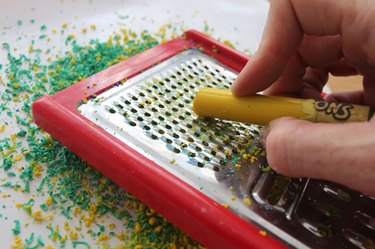
Step 4: Make Crayon Shavings
Peel the paper label off of the crayons you want to use, and use your cheese grater or vegetable peeler to make a pile of colorful shavings on your wax paper. The colorful shavings can be mixed on the paper, or kept separate to make sure the colors stay true when you melt them. You will only need enough crayon shavings to evenly cover half of the wax paper piece. Note: You don't need to grate/peel the entire crayon - these cutting tools can be sharp if not handled properly, so watch your finger tips as you work!
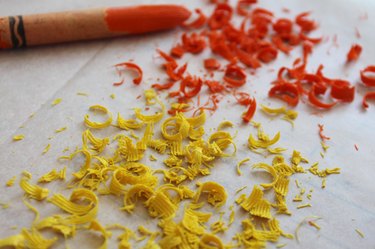
Step 5: Arrange the Crayon Shavings
Consider the pattern you painted on the acrylic frame and arrange the colors of your crayon shavings accordingly. When you iron the folded wax paper, your colors will be locked in place, so decide on the final color arrangement before moving on to the next step.
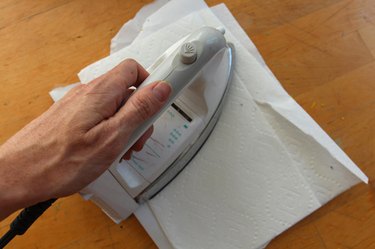
Step 6: Melt the Crayon Shavings
Fold the wax paper page carefully in half. Make sure it is still wider and longer than your acrylic frame. Gently slide two paper towels under the wax paper, and place two paper towels over the wax paper. With your iron on the lowest heat, hold the wax paper and paper towel sandwich in place, as you iron the entire surface of the top paper towel evenly. The paper towels help distribute heat and protect your iron from melted wax.
Warning
This step should only be done by adults. Do not let children near the hot iron or melted crayon until everything is cool to the touch.
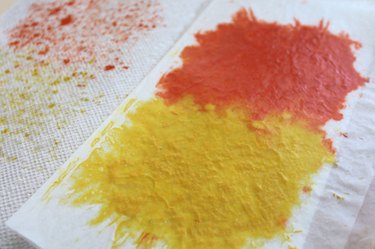
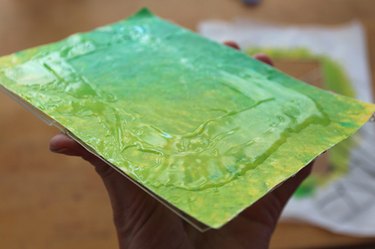
Step 7: Remove the Paper Towels
Pull back the paper towels and the top of the wax paper to check that the crayon shavings are completely melted on the wax paper. If not fully melted, refold the paper and paper towels, and iron until melted. (Note: Some of the wax will melt onto the paper towels.)
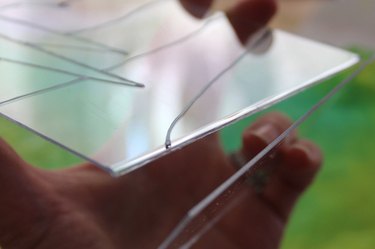
Step 8: Remove the Back of the Frame
While it may seem scary, it's time to gently break off the back panel on the acrylic frame so that you are left with the front side that you painted. These frames are inexpensive for a reason -- the plastic is typically pretty brittle and breaks off easily. The back panel needs to come off so that the paint can be pressed into the melted crayon wax paper.
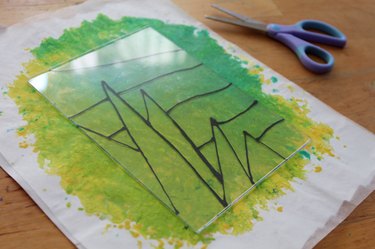
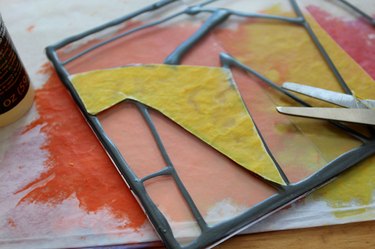
Step 9: Cut the Melted Crayon Paper to Size
When the back portion of the frame is removed, position your frame with the painted-side down onto your melted crayon paper. Use scissors to cut the paper to the exact size of the frame.
Step 10: Coat a Second Frame in Glue
Take a second frame (that still has its back panel intact) and use your permanent clear glue to coat the front of the frame.
Step 11: Sandwich the Acrylic Frames Together
Press the colorful melted crayon paper into the glue on the acrylic frame, and then spread a thin layer of glue directly on top of the colorful paper. Press your painted acrylic frame (paint-side down) into the glue-coated paper.
Tip
Does your painted design have a specific orientation? Before you press your colorful wax paper onto the acrylic frame, check to see where that frame has its mounting panel. If the panel lies flat against the acrylic, that is the top side from which you can hang your art. If your frame has a perpendicular foot for free-standing, that can be the base of a vertical design, or can serve as a stand on either the left or right side. If your art has no specific top or bottom, don't worry about how you glue your colorful wax paper onto the frame.
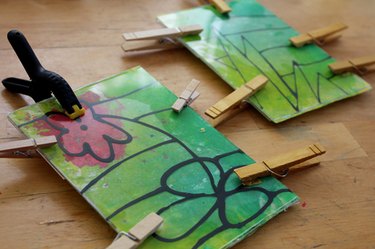
Step 12: Allow the Glue to Cure
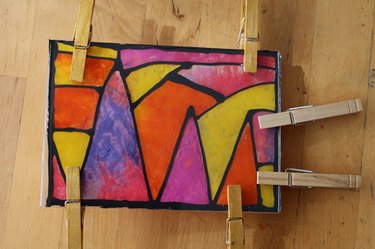
Use clothespins or clamps to keep the acrylic frame "sandwiches" in place as the glue cures. Wipe up any glue that squished out of the frames with a paper towel before it dries, and take care that none of the clothespins have glue on them, or they may end up being difficult to remove.
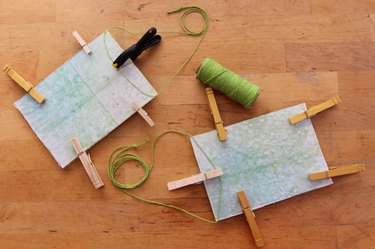
Step 13: Create Hanging Loops (Optional)
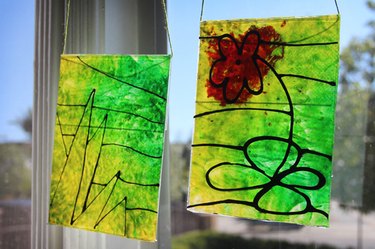
Cut lengths of string and knot them so that you have a giant loop. Pull the loop through the back panel of the acrylic frame. When the glue has dried on the melted crayon sun-catchers, hang them in a sunny place and enjoy. Alternatively, you can prop them up if your frame has a display stand attached to it.
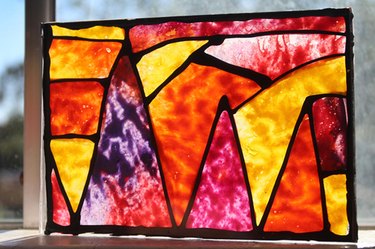
Optional: Make Stained Glass Panels
Prefer the look of traditional stained glass windows? Follow Steps 1-8 above, and then follow the steps below.
Step 1: Cut Various Shapes From Wax Paper
Instead of cutting out one single sheet of wax paper, cut out the exact shapes you painted in your design, from a variety of melted crayon paper pieces. Working with a variety of colors will help you achieve more visual impact with this type of design, so melting five or more colors of crayon shavings onto separate wax paper pieces is recommended.
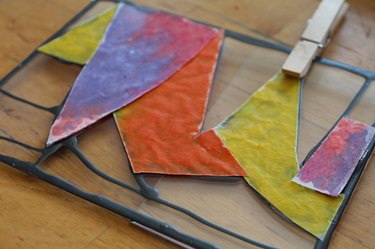
Step 2: Arrange the Paper Pieces on the Frame
As you cut out wax paper pieces that match the design you painted, set them on the acrylic frame so that you can decide which colors will look best together.
Step 3: Glue the Paper Pieces to the Frame
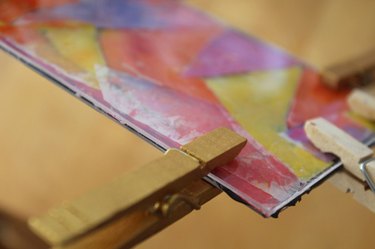
Use clothespins to help keep your wax-crayon papers in place, and glue them to the painted side of your frame as you work.
Step 4: Check Your Work
You can check for gaps in your wax paper pieces as you glue the panels in place, by holding up the melted crayon stained glass against a bright window. If any overlapping wax paper is visible, carefully cut or bend the offending wax paper away. If any gaps show, carefully fill them in with similar-colored paper.
Step 5: Glue a Back to the Frame
Spread glue onto the front of an acrylic frame (with its back still intact), press the frame to the backside of your wax paper design, and secure the art with clothespins as the glue dries. Be sure to clean up any glue drips that may squish out as you press the acrylic panels together.
Step 6: Cure Glue in the Shade
For best results, don't let your glue dry in direct sunlight, as bubbles can develop. Allow the clamped art to cure in a flat, dry area for the recommended length of time listed on your glue bottle.
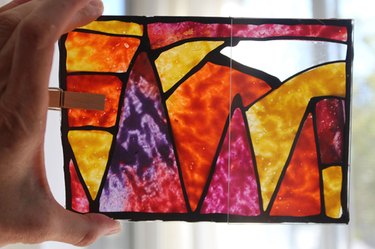
Whether you choose to make a traditional stained glass motif, or opt for the free-form sun-catcher look, this project is sure to result in vibrant artwork that adds cheer to every window.