
How to Work on a Sloan Valve

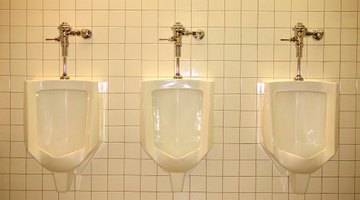
A shiny chrome cup with a handle protruding from the side above the urinal is a common sight in most men’s public restrooms. This device is designed to allow enough water to enter the urinal when the handle is depressed to flush the appliance. Most of the time, the cup is a Sloan flush valve.
These are reliable long-lasting valves, but even the best sometimes need to be repaired.
Things You Will Need
- New Sloan flush mechanism
- Adjustable wrench
-
Turn off the water to the Sloan valve. The water is shut off by first using an adjustable wrench to remove the cap covering a shutoff screw. The cap will be just to the right or left of the cup that houses the valve. Use a screwdriver to tighten the screw under the cap to turn off the water to the valve. On some valves, this might be a nut that requires a wrench. Depress the handle to empty any leftover water from the valve.
-
Unscrew the cap on the top of the valve with the adjustable wrench. Under the cap will be the valve mechanism that controls the water flow during flushing. It is a mushroom-shaped device with the stem extending into the water pipe downward toward the urinal. Almost all Sloan valve repairs are necessary because this device has failed.
-
Lift the mechanism up and out of the cup. Inspect the seat where the device rests for materials that may have lodged there from the water. This often happens when the water is from a private well that is not filtered. If you find debris, clean the seat and mechanism. Reinstall the mechanism, replace the cap, turn on the water and test the valve. If it works, you are finished. However, most of the time, this will not be the problem. If there is no debris or the problem is not fixed, go on to the next step.
-
Wipe off the seat inside the valve with a cloth so it will be ready for the new flush mechanism to be installed. Drop the new device into the cup and make sure that it sits all of the way down on the seat. Replace the cap on to the Sloan valve. Turn the water back on. Flush the urinal a few times to check for leaks. Replace the cap over the water control screw to complete the job.
Warning
Wear some type of latex or similar gloves for protection when working on public restroom appliances.
The Drip Cap
- A shiny chrome cup with a handle protruding from the side above the urinal is a common sight in most men’s public restrooms.
- This device is designed to allow enough water to enter the urinal when the handle is depressed to flush the appliance.
- Turn off the water to the Sloan valve.
- Lift the mechanism up and out of the cup.
- If there is no debris or the problem is not fixed, go on to the next step.
- Wipe off the seat inside the valve with a cloth so it will be ready for the new flush mechanism to be installed.
References
Writer Bio
Allen Teal was first published in 2002 in the "Adult Teacher" and "Adult Student" books for the Assemblies of God Sunday School department. He has also been published on various websites. He received an Associate of Arts in business from Mineral Area College in Park Hills, Mo.
Photo Credits
- Thinkstock/Comstock/Getty Images
- Thinkstock/Comstock/Getty Images
More Articles