
Metal roof flashing is a galvanized sheet metal that is bent at a 90 degree angle about 8 to 12 inches on each side of the angle. It comes in 10-foot lengths, or, for step flashing, 6-inch lengths. It is used to seal the gap between walls and intersecting roofs.
Step 1
Choose the appropriate flashing size. Usually 8-inch flashing will work, but any size will work well.
Video of the Day
Step 2
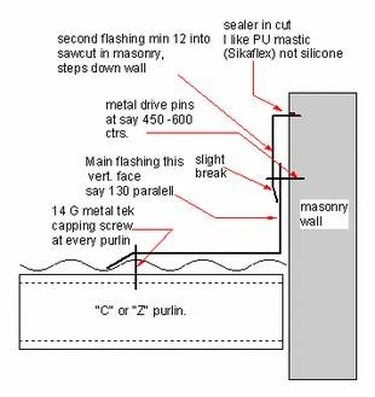
Install base flashing under shingles or over metal roofing material. If the roof runs flat up against the brick wall, you must install the roof side of the flashing either under the last layer of shingles or over the roof material if it is metal. Follow the photo for illustrated instructions.
Step 3

Flash angled roofs in the step method, which requires shorter flashing lengths of 6 inches. If the roof runs at an angle to the brick wall, then you must step the flashing as described in the photo. Make sure that you begin at the bottom of the angle and work up.
Step 4
Caulk any overlapping seams where the flashing meets or where any nail heads might be exposed.
Step 5
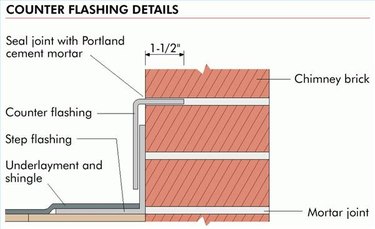
Chalk a straight line about 2 inches above the back of the base flashing. Using the circular saw and masonry blade cut a slot about 1.5 inches into the brick so that the overlapping flashing or counter flashing will slide into the slot. Caulk the slot after the flashing has been installed.
Video of the Day