Pallets are often made with chemically treated wood, which is unsuitable for indoor use but great for outdoor projects, such as a shed foundation. A pallet is often constructed from oak or some other hardwood to help it support the weight it's designed to hold, and this increases its value as a resource for utility building. To construct a stable shed foundation, you need to carefully level the ground and fasten the pallets together securely to prevent them from separating. Cover your pallet foundation with plywood to create a flat floor surface for your storage or workshop shed.
Before You Start
Video of the Day
Most communities impose a limit on the size of outbuildings that can be built without a permit. If the building you're planning exceeds this limit, you'll have to construct a regular foundation to satisfy the building code. The maximum floor area for unpermitted structures is typically 10 by 12 feet, but it may be different in your area, so it's a good idea to check with the building department before you begin construction.
Video of the Day
Step 1
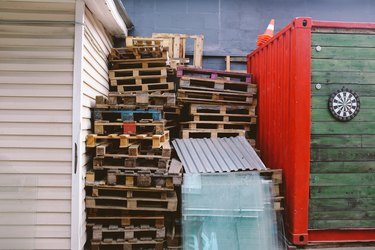
Pick your pallets. All pallets are not created equal. They come in many sizes, and can be made from fir, pine, oak, poplar, or some other type of wood. The pallets you choose don't have to be in perfect shape, but they shouldn't be missing boards. For the purpose of building a foundation, the most important characteristic is thickness—all the pallets you choose for the project should be uniform in this regard. If you get all your pallets from a single source, such as a garden center or a furniture distributor, you'll have a better chance of finding ones that match than if you get them from different sources.
The foundation will last longer if you use pallets made with treated hardwood. If the pallets you choose are made with untreated softwood, it's a good idea to coat them with wood preservative to repel rot and pests.
Step 2
Lay out the perimeter. Mark the foundation perimeter with stakes and string. It's best if the foundation dimensions exactly equal the outside dimensions of the building. That way, water from the sides and roof will drain down the sides of the foundation rather than collecting on top of it and seeping under the walls. If the pallet dimensions render this impossible, make the foundation larger than the shed rather than smaller.
Step 3
Dig and level the building site. Measure the width of the pallets and dig out a pad area that is about half this depth. This ensures the top of the foundation is above grade. If you opt to set the pallets on paving stones to keep them off the ground and lengthen their lives, increase the depth of the pad by the thickness of the pavers. Level the ground and compact the soil with a tamper or roller.
Step 4
Prepare the pallets. Pry the boards off one side of a double-sided pallet to give it more stability. Cut the boards on the top side of the pallet flush with the outer runners. This allows you to butt the pallets together and connect them.
Step 5
Place the pallets. Set the pallets in place on the pad with their outer runners touching. If you set the pallets on pavers, be sure all the pallets are uniformly supported. This usually means placing a paver under the outer corners of the foundation as well as under each corner where one or more pallet touches.
Step 6
Connect the pallets. Fasten two pallets together by driving 3-inch deck screws at an angle through the runner of one pallet into that of another. You can also connect them using metal fastening plates. Set the plate across a pair of runners and screw it down with 1-inch galvanized screws.
Step 7
Cover the pallets with plywood. Increase the stability of the foundation and make it more usable by covering the pallets with plywood. Use 1/2- or 3/4-inch exterior grade plywood or (for maximum service life) pressure-treated plywood. Screw the plywood down with 1 1/2-inch galvanized screws.
Your foundation is ready to build your shed.