
Making a one-minute timer is a great project for you to put together with your children. Using a few household items, you can easily make this simple one-minute sand timer in no time. You can use it to teach young children the concept of time management and what the length of one minute is, or use it to time turns in family games. These instructions can easily be adapted to create a sand timer of longer durations by adjusting the amount of sand used in Step 3. Why buy expensive kitchen timers when you can make one in five minutes?
- Two clear plastic cups (being able to see into the cups is important)
- Sand (can be purchased at hobby, craft or garden stores)
- Stopwatch
- Pin or other sharp object to poke holes with
- Cardboard or plastic to use as lids
- Scissors
- Tape or glue
Try and find cups of soft plastic -- they will be easier to poke holes through. Using colored sand in the timer can help make it easier to see.
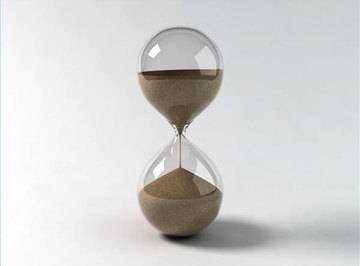
Take one plastic cup and place it upside down on a table. The other cup will be placed on top of the first one so that the bottoms of the two cups are touching. The two cups will form a rough hourglass shape. Place tape around the cups where the bottoms meet so they are securely fastened.
Using a pin or other sharp object, poke a tiny hole through the bottoms of the cups. Be careful not to make the hole too large, and make sure the hole goes through the bottoms of both of the cups. If the cups are made of stiff plastic, it may help to carefully heat up the pin using a lighter or candle right before poking the hole. Parents should not let children perform this step and should be very careful when heating up the pin.
Measure out some sand and place it in the top cup of the cup timer. Make sure the sand can pass through the hole you made in Step 2. If no sand is passing through, slightly enlarge the hole. Place the cup timer on top of a plate or bowl to catch the sand passing through it, and use the stopwatch to time how long it takes the sand to pass through to the bottom of the timer. Adjust the amount of sand until it takes exactly one minute (or your desired duration) for all of the sand to pass from the top to the bottom of the timer.
Cut two circles out of your cardboard or plastic. These circles will be used as lids for the open mouths of the cups. To get the proper size, place the cup timer on the cardboard or plastic and trace around the circumference of the cup with a pencil or marker. First, attach one of the lids to the open mouth of one cup using tape or glue. Make sure it is firmly attached. Next, place your sand in the timer's other open mouth and affix the second lid in the same manner. You should now have a sealed and contained one minute sand timer.
Things You'll Need
Tips
References
Tips
- Try and find cups of soft plastic -- they will be easier to poke holes through. Using colored sand in the timer can help make it easier to see.
About the Author
This article was written by the CareerTrend team, copy edited and fact checked through a multi-point auditing system, in efforts to ensure our readers only receive the best information. To submit your questions or ideas, or to simply learn more about CareerTrend, contact us [here](http://careertrend.com/about-us).
Photo Credits
Photo by Satendra Mhatre - downloaded from http://www.sxc.hu